By: Mohammed zandar (yup.work90) • Last updated: March 5, 2026
Self-watering planters are perfect for small apartments for one simple reason: they turn watering into a controlled system instead of a daily guessing game. But “self-watering” doesn’t mean “never think about water again.” It means the planter supplies moisture slowly (usually by capillary action), while you manage the setup, refill rhythm, and occasional cleaning.
This guide helps you choose the right size, understand wick vs. reservoir designs, and set up a self-watering pot the way it’s meant to work (so you don’t accidentally create a root-rot machine).
Quick start: pick the right system fast
| If you want… | Choose… | Best for | Common mistake |
|---|---|---|---|
| Lowest effort and fewer parts | Wick | Herbs, most leafy houseplants, simple setups | Wrong wick material or soil too chunky to wick |
| More control and longer time between refills | Reservoir with overflow | Medium-to-large indoor plants, travel weeks | Keeping the reservoir full all the time (no dry-down) |
| Plants that prefer to dry fully | Neither (or use as “assist” only) | Cacti, many succulents | Using self-watering as a constant wet source |
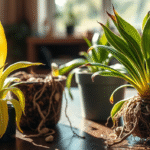
Important: overwatering is still possible. Roots need oxygen as well as water, and constant saturation can cause roots to rot. Clemson HGIC
How self-watering planters work (in plain English)
Most self-watering planters have two zones:
- A reservoir that holds water at the bottom
- A growing zone where soil and roots sit
Water moves upward through soil or a wick by capillary action (the same physics that lets a paper towel soak up a spill). Wicking containers are designed to let the plant pull moisture as needed from a built-in reservoir. University of Kentucky (PDF) Capillary irrigation (wicks/mats) is also widely studied as a water-efficient way to deliver moisture to container plants. MDPI Horticulturae
Wick vs. reservoir: what’s the real difference?
1) Wick systems
A wick system uses a strip/cord (or built-in wick column) that connects soil to the reservoir. The wick draws water up into the soil gradually.
- Pros: simple, affordable, fewer moving parts
- Cons: if the soil is extremely chunky (lots of bark, big perlite), it may not wick evenly
- Apartment win: small footprint planters for shelves and window ledges
My practical wick rule: choose a wick that doesn’t rot quickly. Synthetic wicks often last longer than cotton in constantly damp conditions. If the wick dries out completely, the system may “break contact” and need a top-water recharge to start wicking again.
2) Reservoir systems (false bottom + overflow)
These have a larger water chamber under the soil platform. Many include an overflow hole or water-level indicator. The soil draws from the reservoir through capillary action, sometimes assisted by wick columns.
- Pros: longer refill interval, easy to monitor water level
- Cons: mineral buildup in the reservoir if you never flush; roots can grow into the reservoir if constantly full
- Apartment win: fewer spills and less “sink watering”
Root rot warning: if the reservoir stays full 24/7, some plants never get oxygen in the root zone. Clemson notes roots need oxygen and can rot when surrounded by water. Clemson HGIC
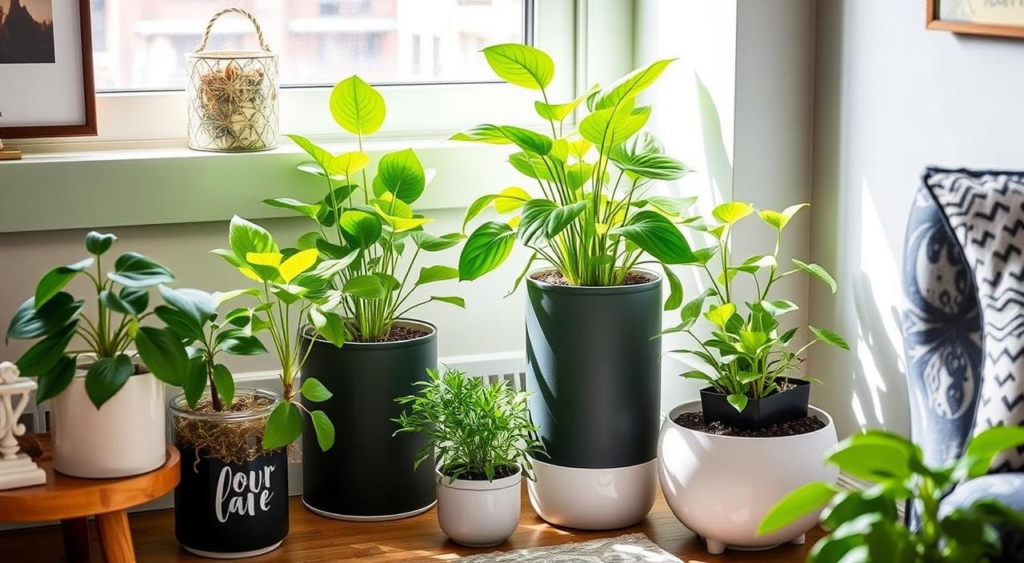
Size guide for small apartments (what actually fits and works)
In apartments, planter sizing isn’t just plant biology—it’s also furniture, walkways, and sunlight angles. Use this as a realistic guide.
| Location | Typical max planter size | Best plant types | What to watch |
|---|---|---|---|
| Window sill/ledge | 10–15cm (4–6in) wide pots; low profile | Herbs, small pothos, peperomia, baby plants | Heat/cold swings near glass, curtains brushing leaves |
| Countertop/desk | 12–18cm (5–7in) | Compact tropicals, small ferns, African violets | Drips on wood; use a tray under the pot |
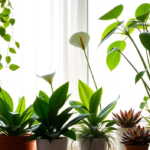
| Corner floor “statement” plant | 20–30cm (8–12in) | Peace lily, medium dracaena, rubber plant (young) | Weight when filled; protect flooring |
| Balcony rail shelf | Narrow troughs or slim planters | Herbs, leafy greens, flowers | Wind dries soil fast; refills needed more often |
A simple sizing rule that prevents 80% of problems
Don’t oversize the pot. If you jump from a small nursery pot into a much larger self-watering container, the root zone can stay too wet for too long. Choose a planter that’s about 2–5cm (1–2in) wider than the current root ball for most houseplants. (If you’re unsure, choose smaller. You can always upsize later.)
Setup steps (wick and reservoir) the “approval-safe” way
Most self-watering failures come from skipping two steps: pre-moistening the mix and top-watering at the beginning. Do this once and the system behaves predictably.
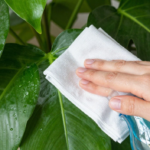
Step 1: Clean the planter (especially if reused)
Scrub off old soil and deposits. If you’re reusing a container, disinfect it to reduce pathogens. Iowa State recommends soaking containers in a solution of 1 part household bleach to 9 parts water for at least 10 minutes, then rinsing well. Iowa State Extension
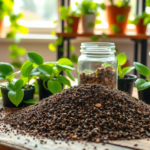
Step 2: Choose a soil mix that wicks but still breathes
Self-watering planters need a mix that can pull water upward. Extremely chunky aroid mixes may wick poorly. A reliable “apartment mix”:
- 2 parts indoor potting mix (peat-free is fine)
- 1 part perlite
This holds moisture without collapsing into mud.
Step 3: Pre-moisten the soil (this makes wicking work)
Before planting, dampen the soil so it feels like a wrung-out sponge. Dry potting mix can repel water at first; pre-moistening helps the system “connect” quickly. Clemson HGIC
Step 4: Install wick or reservoir parts correctly
- Wick system: ensure the wick touches the reservoir water and runs up into the soil zone (good contact on both ends).
- Reservoir system: confirm there’s an overflow hole or designed air gap, and that the soil platform isn’t sitting submerged.
Wicking containers are designed with a built-in reservoir that allows self-irrigation through capillary movement. University of Kentucky (PDF)
Step 5: Plant and top-water once (yes, even for “self-watering”)
Plant your houseplant, backfill with pre-moistened soil, and top-water thoroughly the first time to settle soil around roots. This also “charges” the wicking pathway so the reservoir can do its job after.
Step 6: Fill the reservoir to the recommended line, then pause
Fill the reservoir (not above overflow). Then watch how fast the water level drops over the next week. Your first week is calibration.
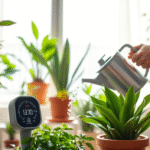
Step 7: First-week monitoring checklist
- If the soil surface stays wet for days, your plant may be getting too much water—reduce reservoir fill level.
- If the top dries while the plant still looks thirsty, the wick may not be contacting well—top-water once and check wick placement.
- If you smell sour soil or see yellowing + limp growth, stop refilling and let the pot dry down; overwatering can cause root decline and rot. Clemson HGIC
Refill rhythm: how often will you actually refill?
There’s no universal schedule because apartments vary (heat, light, airflow). But you can estimate refills based on three factors:
- Plant thirst: peace lily drinks more than a snake plant
- Light and temperature: bright + warm = faster water use
- Pot size: bigger reservoir = longer interval
Rule of thumb (apartment reality): expect refill ranges from 3–7 days for thirsty tropicals in bright spots, and 7–14 days for moderate plants in average indoor light. Use the first two weeks to learn your plant’s “normal” drop rate, then your planter becomes truly low-stress.
Maintenance that prevents smell, salts, and root issues
1) Monthly flush (especially if you fertilize)
Self-watering systems can concentrate minerals and fertilizer salts over time. Once a month (or every 6–8 weeks), top-water generously so water runs through and carries residues out via overflow/drain points. Then return to reservoir watering.
2) Seasonal adjustments
In winter, indoor plants often use less water (lower light, cooler temps). Let the reservoir run lower before refilling. In summer, refills may increase. If you keep the reservoir full year-round, you risk keeping roots too wet when the plant isn’t actively growing. Clemson HGIC
3) Clean the reservoir every 2–3 months
Empty the reservoir, rinse, and wipe residue. If you notice algae or smell, do a deeper clean and disinfect. Iowa State’s container disinfecting method (1:9 bleach solution, 10 minutes) is also suitable for many pots and trays when used carefully and rinsed well. Iowa State Extension
Troubleshooting (the problems apartment growers actually hit)
| Symptom | Likely cause | Fix |
|---|---|---|
| Yellow leaves + soil smells sour | Root zone staying too wet | Stop refilling, let it dry down, check roots if severe; constant saturation can lead to rot because roots need oxygen Clemson HGIC |
| Top looks dry but plant wilts | Wick not wicking; soil hydrophobic; poor contact | Top-water once to “restart” capillary flow; re-seat wick for firm contact (soil and reservoir) |
| White crust on soil or reservoir | Mineral/salt buildup from tap water/fertilizer | Monthly flush; consider filtered water; clean reservoir |
| Roots growing into reservoir | Reservoir always full; roots chasing water | Allow partial dry-down; keep water level lower between refills |
| Mold on soil surface | Too wet + low airflow | Reduce reservoir level, increase airflow/light, remove top layer and replace with fresh mix |
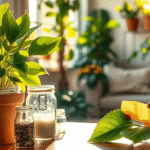
Simple DIY options (if you don’t want to buy a new planter)
If you’re in a small apartment and want to test the concept before investing, a basic wick container can be made with two containers and a wick. Garden Organic explains the wick uses capillary action to siphon water from a reservoir up to the planter. Garden Organic (UK)
- Use a bottom container as the reservoir.
- Use a top pot with drainage holes for the plant.
- Thread a wick through the drainage hole so one end sits in the reservoir and the other end runs into the soil.
- Top-water once, then fill the reservoir and observe for a week.
FAQ
Q: Are self-watering planters good for all houseplants?
No. They’re best for plants that like consistent, moderate moisture (many tropical foliage plants). Plants that prefer to dry completely (many cacti/succulents) often do better in standard pots, or with self-watering used only as an occasional assist.
Q: Can self-watering planters cause root rot?
Yes, if the system keeps the root zone saturated. Roots need oxygen, and constant waterlogged conditions can cause roots to rot. Clemson HGIC
Q: Do I still need to water from the top?
Usually yes, occasionally. Top-watering helps “charge” the wicking system at setup and helps flush salts/minerals later. Many apartment growers do a monthly flush, then go back to reservoir refills.
Q: Wick or reservoir: which is better for small apartments?
Wick systems are the simplest and great for small pots. Reservoir systems are better when you want longer refill intervals and more control (especially if the planter has an overflow feature). Both rely on capillary action to deliver water upward. University of Kentucky (PDF)
About the author
Mohammed zandar (yup.work90) writes practical, research-backed indoor plant guides built for real apartments. His focus is reducing plant care guesswork with simple systems: correct pot sizing, predictable watering setups, and troubleshooting steps that prevent common failures.
Sources
- Clemson University HGIC – Indoor Plants: Watering (roots need oxygen; overwatering risks)
- University of Kentucky – Wicking Containers: A Self-Watering Garden System (PDF)
- MDPI Horticulturae – Review of capillary irrigation systems (wicks/mats)
- Iowa State University Extension – How to Clean and Disinfect Plant Containers
- Garden Organic (UK) – Make a self-watering container (capillary wick explanation)