You water your plants, you move them toward better light, you check the soil — and then a few months in, you notice they look a little dull. Not dying, just flat. Run a finger along a leaf and you’ll often find the answer: a fine grey layer of household dust that’s been quietly building up since the last time anyone thought to clean them.
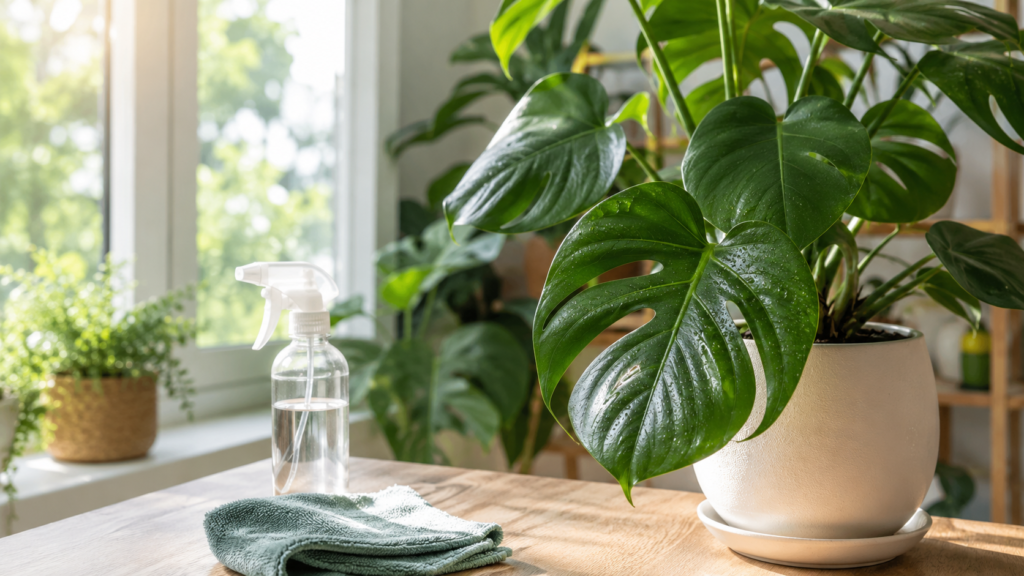
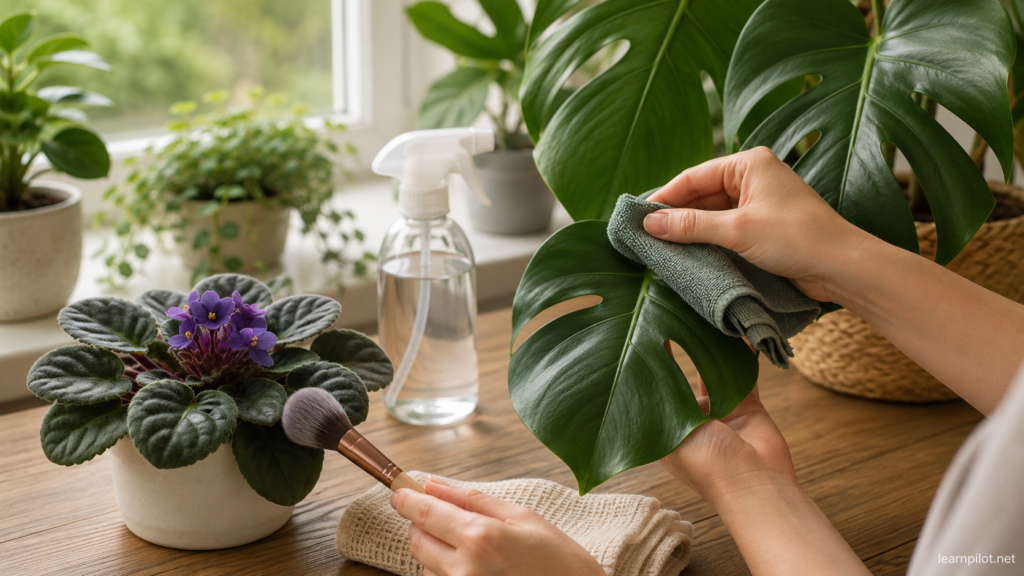
Quick Answer: The best way to clean smooth houseplant leaves is to gently wipe them with a damp microfiber cloth supported from underneath. For fuzzy leaves like African violets, use a soft, dry makeup brush. Never use mayonnaise, milk, or aerosol leaf shine sprays, as these can leave residue, attract pests, and interfere with normal leaf function.
Best for: Indoor plant owners who want clean, healthy-looking leaves without using leaf shine sprays or food-based hacks
Time needed: 5–15 minutes depending on plant size
Main skills: Matching cleaning method to leaf type, wiping gently, drying leaves, checking for pests
Best method: Use a damp microfiber cloth for smooth leaves and a dry soft brush for fuzzy leaves
Important: Do not use mayonnaise, milk, banana peels, cooking oils, or aerosol leaf shine sprays on houseplant leaves. These can leave residue, attract pests, and make future dust buildup worse.
Cleaning houseplant leaves isn’t just cosmetic. Dust can reduce how much light reaches the leaf surface, interfere with the tiny pores that regulate gas exchange, and make it easier to miss early pest problems hiding on leaf undersides. This guide covers how to clean different leaf types properly, what to use, what to skip, and how to build a simple routine that doesn’t feel like an extra chore.
Table of contents
- Why cleaning leaves matters
- Choosing the right method by leaf type
- Tools and safe cleaning ingredients
- How to clean leaves safely, step by step
- Fixing common problems: spots, stickiness, and pests
- What not to do
- A realistic cleaning routine
- Final Thoughts on Plant Maintenance
- FAQs
- Sources and further reading
Why Cleaning Leaves Matters
There are three practical reasons to clean houseplant leaves regularly, and none of them are just about appearance.
- It helps your plant use light efficiently. Dust acts like a physical shade cloth over the leaf surface. A consistent layer of household dust reduces the amount of light reaching the chlorophyll cells, which slows photosynthesis. A paper published in 2022 in a peer-reviewed journal confirmed that dust accumulation measurably reduces the physiological functioning of plants — even relatively thin layers make a difference over time
- It doubles as a quick health check. Wiping leaves means you’re looking closely at both surfaces, including the undersides — exactly where spider mites, scale, and mealybugs tend to establish themselves first. Catching an infestation when it’s still a few insects rather than a full colony makes treatment far simpler
- It keeps the stomata clear. Stomata are the tiny pores on leaf surfaces that regulate gas exchange and water vapour. Heavy dust buildup can partially block them, interfering with the plant’s ability to breathe and transpire normally
A simple gauge: if you can see a dull, greyish cast on the leaves, or you feel grit when you gently rub a leaf between your fingers, it’s time to clean.
Choosing the Right Method by Leaf Type
Not all plants can be cleaned the same way. Water left sitting in the crown of a rosette or trapped in leaf hairs can cause rot or fungal problems quickly. The method needs to match the leaf.
| Leaf type | Best method | Notes |
|---|---|---|
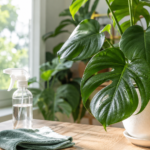
| Large, smooth leaves (Monstera, rubber plant, fiddle-leaf fig) | Damp microfiber wipe | Support the leaf from underneath while wiping. Work from the base toward the tip. Dry immediately afterward to prevent water spots |
| Many small leaves (pothos, ivy, ferns) | Gentle shower rinse | Much faster than wiping individual leaves. Keep pressure low and water lukewarm — not cold |
| Fuzzy or hairy leaves (African violet, some begonias) | Dry soft brush only | Never use water on these. The hairs trap moisture against the leaf surface and fungal spots follow quickly. A soft makeup brush lifts dust without any contact damage |
| Succulents and cacti | Dry brush only | Keep moisture away from rosette centres and stem joints to prevent crown rot |
Tools and Safe Cleaning Ingredients
What you actually need
- Two microfiber cloths: one damp for cleaning, one dry for buffing — microfiber is gentle, lint-free, and picks up dust without scratching leaf surfaces
- A soft makeup brush: essential for fuzzy leaves, succulents, and getting into tight leaf axils
- A spray bottle: a fine mist is safer and more controlled than pouring water directly onto leaves
What’s safe to use as a cleaning solution
- Lukewarm water: sufficient for the vast majority of routine dust cleaning — no additives needed
- Very mild soap solution: add no more than ¼ teaspoon of pure castile soap to 1 litre of water; only necessary for sticky grime or honeydew residue, and always wipe off with plain water afterward
- Diluted white vinegar: 1 tablespoon per litre of distilled water, used only for dissolving hard-water mineral deposits, not as a general cleaner
- Diluted neem oil or insecticidal soap: for treating active pest infestations, not for adding shine to healthy leaves
Skip the viral hacks: mayonnaise, banana peels, milk, and cooking oils are regularly suggested online as leaf-shine tricks. All of them leave an organic or greasy film on the leaf surface that clogs stomata, attracts more dust, and in the case of banana peels and food-based residues, draws fruit flies and fungus gnats. They don’t benefit the plant in any way.
How to Clean Leaves Safely, Step by Step
Step 1: Prep the plant and protect the soil
Move larger plants to a sink, bathtub, or shower before cleaning. If you plan to rinse the plant with water, cover the top of the soil loosely with plastic wrap or a plastic bag to prevent dirt and water from splashing up onto the leaves you’ve just cleaned — and to stop excess water from soaking into an already-watered pot.
Step 2: Wipe with lukewarm water
Dampen your microfiber cloth with lukewarm water — not cold. Cold water can cause pale or straw-coloured spots on tropical plant leaves, which look similar to hard-water marks and can be alarming if you don’t know what caused them. Support each leaf from underneath with your free hand, and wipe gently from the base toward the tip. Working in one direction reduces the chance of tearing the leaf or stressing the stem where it connects.
Step 3: Dry and buff immediately
Don’t let leaves air dry — this is what causes hard-water spots, especially if your tap water is mineral-rich. Follow each damp wipe with a dry microfiber cloth, patting the leaf gently dry. Light buffing with the dry cloth also restores the leaf’s natural sheen without any sprays or products. If you live in a humid climate, manual drying is especially important: high ambient humidity slows evaporation and leaves standing water on leaf surfaces long enough for fungal problems to develop.
Fixing Common Problems
Hard-water spots (white mineral deposits)
If your tap water is hard — common in many parts of the UK and other regions — it will leave white, chalky marks on leaves when it dries. To remove them, mix 1 tablespoon of white vinegar into 1 litre of distilled water. Dampen a cloth with the solution and wipe away the mineral scale gently. Immediately follow with a plain-water wipe to remove the acidity from the leaf surface, then dry. Don’t use this solution on fuzzy-leaved plants or as a regular cleaning method — it’s only for dissolving existing mineral deposits.
Sticky residue (honeydew from pests)
If leaves feel tacky or look lacquered in places, the plant almost certainly has a pest — usually aphids, scale, or mealybugs secreting a sticky substance called honeydew. Mix ¼ teaspoon of mild castile soap into 1 litre of water and wipe the sticky areas clean, then follow with a plain-water wipe. Removing the honeydew is only the first step — you’ll need to treat the underlying pest problem as well, otherwise the residue returns within days.
Using neem oil for pest treatment
If you’re treating an active pest infestation with diluted neem oil, keep the plant out of direct sunlight until the leaves are completely dry. Oil on leaf surfaces in direct sun acts as a magnifier and can cause severe scorch marks very quickly — this is one of the more common and avoidable plant care mistakes. Apply neem oil in the evening or move the plant to a shaded spot for the day while it dries.
What Not to Do
A few specific mistakes come up repeatedly and are worth naming directly.
- Aerosol leaf shine sprays: commercial polishes and aerosol-based products can cause cold burn, leave a sticky residue that attracts more dust, and clog stomata. The Royal Horticultural Society specifically advises against using these products on houseplants. If you want shiny leaves, buffing with a dry cloth achieves the same effect without any of the downsides
- Banana peels: a popular internet tip, but the natural sugars left on the leaf surface attract fungus gnats and fruit flies. They do nothing useful for the plant.
- Straight dish soap: most modern dish soaps are formulated as degreasers and are far too harsh for leaves — they can strip the natural waxy cuticle that protects the leaf surface. If soap is genuinely needed, pure unscented castile soap diluted in water is the appropriate choice
- Cold water on tropical plants: can cause chlorotic spotting that’s sometimes mistaken for disease or mineral damage
A Realistic Cleaning Routine
The most effective cleaning routine is one that’s simple enough to actually do. Tying it to your regular watering schedule works well — you’re already looking at your plants, already picking up the pot, already in the right mindset.
- Every two weeks: do a quick 30-second dry dusting with a microfiber cloth while you’re checking soil moisture — this handles ordinary household dust before it has time to build up into a thick layer
- Every two months: do a more thorough clean with a damp wipe or a lukewarm shower rinse, especially for plants near kitchens or high-traffic areas where grease and grime accumulate faster
If you have a large collection, it helps to work through plants in sections — a few per watering session — rather than trying to clean everything in one go. The goal is consistency, not perfection.
Final Thoughts on Plant Maintenance
Cleaning houseplant leaves is one of those care tasks that looks minor but quietly has a real impact over time. A plant in genuinely clean condition absorbs light more efficiently, breathes through unclogged pores, and gives you a much better chance of spotting pest problems before they become serious. None of the methods here are complicated — the most useful thing you can do is simply make it a regular habit rather than an occasional deep-clean project.
The key things to remember: match the method to the leaf type, use lukewarm water rather than cold, dry leaves thoroughly after cleaning, and ignore the internet hacks involving food-based products. A damp microfiber cloth and five minutes of attention is all most houseplants need.
FAQs
Are leaf shine sprays bad for plants?
Yes, for most plants. Commercial aerosol polishes can cause cold burn from the propellant, leave a sticky film that attracts dust and blocks stomata, and the Royal Horticultural Society advises against using them on houseplants. The natural shine that comes from buffing a clean leaf with a dry cloth looks just as good and causes none of those problems.
How do you clean plants with lots of tiny leaves?
For trailing plants like pothos or bushy ferns, wiping individual leaves one by one isn’t practical. Place the plant in the shower and rinse with lukewarm water on the lowest, gentlest setting — a handheld shower head works well. Cover the soil beforehand to avoid waterlogging and allow the plant to drain fully before returning it to its spot.
Can I use rubbing alcohol to clean houseplant leaves?
Not as a general cleaner — it’s too drying and can damage the leaf surface with repeated use. Isopropyl alcohol does have a specific, useful role: applied with a cotton swab directly onto individual mealybugs or scale insects, it dissolves their protective coating and kills them on contact. For that targeted purpose it’s genuinely effective; for general dust removal it’s unnecessary and potentially harmful.
How often should I clean my houseplant leaves?
A light dry dusting every two weeks keeps dust from accumulating significantly. A thorough damp clean every six to eight weeks removes any built-up grime. Plants near kitchens, open windows, or high-traffic areas may need more frequent attention. The visual cue is reliable: if the leaves look dull or feel gritty when touched, it’s time.
Can I clean leaves with tap water, or do I need distilled water?
Tap water works fine for cleaning in most areas. The only situation where it causes a visible problem is hard water — high in dissolved minerals — which leaves white chalky spots when it dries on smooth leaves. If your tap water is hard, either dry leaves immediately after wiping (before the water has a chance to dry and leave deposits), or use filtered or distilled water for cleaning. The vinegar solution described in the troubleshooting section will remove existing mineral spots if they’ve already formed.
Is it safe to wipe leaves on plants that are currently in flower?
Generally yes for the leaves, but avoid getting water on flowers directly — moisture sitting in blooms can cause petal spotting and speeds up decay. Wipe the foliage as normal and work around the flowers carefully. For plants in full bloom, a dry dusting is safer than a damp wipe if the flowers are close to or resting on the leaves.
Sources and Further Reading
- Chaurasia M, et al. (2022) – Impact of dust accumulation on the physiological functioning of selected herbaceous plants
- Royal Horticultural Society (RHS) – Leaf damage on houseplants
- University of New Hampshire Extension – Cleaning houseplant leaves
- Colorado State University Extension – Managing houseplant pests
Editorial note: always patch-test any new cleaning solution on a single leaf and wait 24 hours before treating the whole plant.