Why cleaning houseplant leaves matters
- It helps your plant use light efficiently. Dust on leaves can reduce photosynthetic rate and stomatal conductance in dusty environments.1
- It turns “plant care” into a quick health check. Wiping leaves forces you to look closely for early signs of mites, scale, or mealybugs, and removes sticky honeydew before it spreads.6
- It reduces leaf wetness time after rinsing. Clean leaves shed water more evenly; good airflow and faster drying can reduce conditions that favor fungal leaf spot issues.9
Practical rule: if you can see a dull, gray cast or feel grit when you rub a leaf gently, it’s time to clean.
Choose the right method by leaf type (quick guide)
- Smooth leaves: dry dust first, then damp-wipe if needed.
- Many small leaves: low-pressure shower rinse is usually faster than wiping one-by-one.
- Fuzzy or textured leaves: dry brush only (water can linger and cause marks).
- Succulents/cacti: dry brush; keep water out of rosettes and crevices.
| Leaf type | Best method | Notes |
|---|---|---|
| Large, smooth leaves (Monstera, Rubber plant, Fiddle-leaf fig) |
Damp microfiber wipe + optional lukewarm shower rinse | Support the leaf from underneath to prevent tears. Wipe base-to-tip. Finish by drying to prevent spots.3 |
| Many small leaves (Pothos, Ivy) |
Gentle shower rinse or soft brush dusting | Rinsing is faster than wiping leaf-by-leaf. Keep water pressure low and temperature lukewarm.3 |
| Fuzzy / hairy leaves (African violet, some begonias) |
Dry, soft brush only | Avoid aerosols and “shine” sprays; avoid cold water splashes that can spot leaves.4 |
| Succulents & cacti | Dry brush + spot-clean only if needed | Keep moisture out of rosettes and joints. If you must damp-wipe, dry immediately and give airflow. |
Tools + safe ingredients (what actually works)
Tools
- Microfiber cloths (2): one for cleaning, one for drying/buffing
- Soft makeup brush or artist brush (great for fuzzy leaves and succulents)
- Spray bottle (fine mist is better than a hard jet)
- Optional: showerhead with gentle pressure
- Optional: microfiber glove (helps when you have many large-leaf plants)
Plant-safe cleaning options
- Lukewarm water (enough for normal dust)2
- Very mild soap solution (only for sticky residue or heavy grime; rinse/wipe off after)2
- Very diluted white vinegar (for mineral spots only; patch test and wipe with plain water afterward)5
- Neem oil or insecticidal soap (for pests, not “shine”; follow the label, patch test, and avoid bright sun until dry)6
Skip greasy shortcuts (cooking oils, mayonnaise, heavy polishes). They can leave residue that attracts dust and can create new problems to clean later.5
Step-by-step: how to clean houseplant leaves naturally
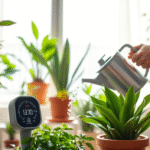
- Use lukewarm water. Hot or cold water can injure leaves; cold splashes can cause spotting on some plants.24
- Avoid aerosols. Some leaf damage is linked to aerosol exposure; RHS specifically advises avoiding aerosols like leaf shine products.4
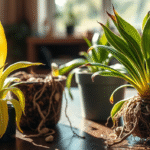
- Don’t clean stressed plants. If your plant is wilting, newly repotted, sunburned, or very dry, fix the environment first.6
- Patch test anything besides water. Try one or two leaves and wait 24 hours before doing the whole plant.
Step 1: Move the plant + protect the soil
- Put the plant in a sink, bathtub, or shower (or on a towel on the floor).
- If you plan to rinse, cover the soil with plastic wrap or a bag to reduce mess and prevent soil splash onto leaves.
Step 2: Start with dry dusting (fastest + safest)
- Use a dry microfiber cloth for smooth leaves.
- Use a soft brush for fuzzy leaves, succulents, and tight crevices.
- Support large leaves from underneath with your free hand.
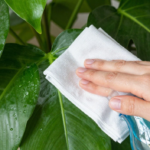
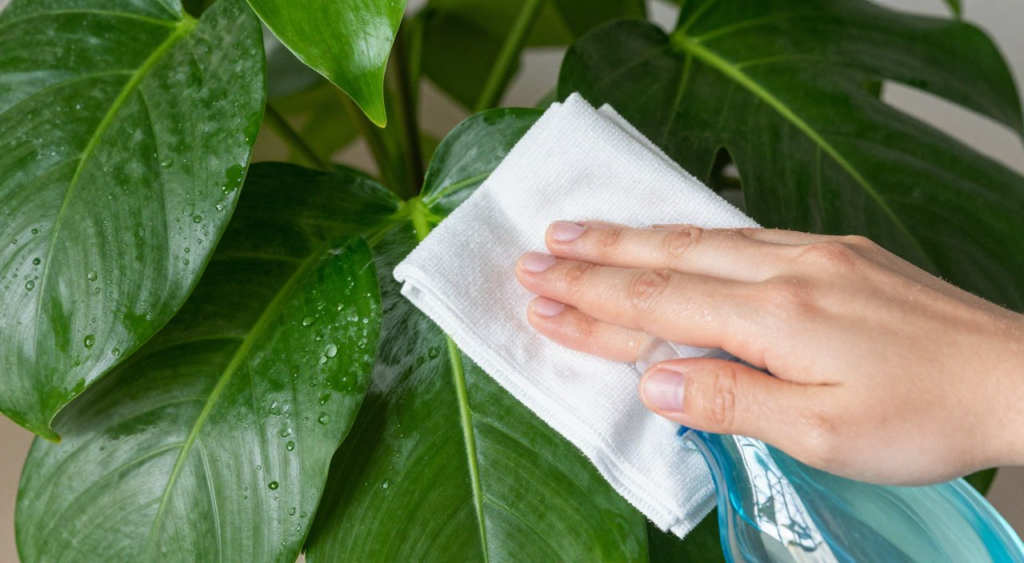
Step 3: Use a damp wipe for stuck-on grime
- Dampen (don’t soak) your cloth with lukewarm water.2
- Wipe from the leaf base toward the tip (so you don’t push dirt into the petiole/stem).
- Flip the cloth often so you aren’t rubbing dirt back onto the plant.
Step 4 (optional): Rinse in the shower for dense plants
- Use lukewarm water and low pressure.3
- Spray until dust stops running off.
- Shake excess water and let the plant dry in bright shade with airflow.
Step 5: Dry and buff (natural sheen, no sprays)
- Pat dry with a clean microfiber cloth, especially on glossy leaves (this prevents water spots).
- Lightly buff for a natural sheen—no coatings needed.
- Mild soap (sticky residue): start at ~¼ teaspoon mild dish soap per 1 quart (≈1 liter) of water. Wipe, then wipe again with plain water.2
- Important: dish detergents can injure leaves, so use the weakest mix that works and rinse/wipe off after. If you’re treating pests, consider a labeled insecticidal soap instead.6
- Mineral spots: 1 tablespoon white vinegar in 1 quart of distilled or rainwater. Patch test, wipe gently, then wipe with plain water and dry.5
Fix common leaf problems (without damaging the plant)
1) Water spots / mineral deposits
- Prevent new spots: avoid splashing leaves when you water, and use distilled/filtered water if your tap water leaves deposits.
- Remove existing deposits: wipe with a vinegar-and-water mix (very diluted), then wipe with plain water and buff dry.5
- Do not use “horticultural vinegar” indoors. High-strength acetic acid products can be hazardous and can damage plant tissue.10
2) Sticky residue (often honeydew from pests)
- Inspect under leaves and along stems for pests (scale and mealybugs often hide in joints).
- Wipe residue with a mild soap solution, then wipe again with plain water.2
- Repeat every few days until residue stops returning.
- If residue returns fast, treat the pest problem (not just the symptoms). See the next section.
3) Mealybugs / scale / mites (when cleaning becomes pest control)
For light infestations, physical cleaning helps, but pests often require repeat treatment.
Colorado State University Extension notes that insecticidal soaps are commonly used for houseplant pests, while warning that dishwashing detergents can cause plant injury.6
If you use neem oil, follow label directions and keep plants out of strong sun until the foliage is dry; oils can contribute to leaf burn in sunlight.8
For general neem oil safety and label-first guidance, see NPIC (Oregon State University).7
4) Leaf spots after cleaning
What NOT to do (common mistakes that backfire)
Don’t use oily “shine” hacks as your main method
Oils and polishes can look great for a day, then collect dust and turn into a sticky film. Some leaf problems are also linked with aerosol damage, and RHS advises avoiding aerosols such as leaf shine products.4
If you want leaves to look better, clean and buff dry instead.
Don’t rub banana peel on leaves (unless you enjoy re-cleaning)
Banana peel can create a quick shine, but it may leave residue that attracts more dust and can be messy on textured leaves. Even “fun” hacks should earn their place in your routine.11
Don’t go too strong with acids or soap
- Too much vinegar can irritate leaves—always dilute and patch test first.5
- Too much soap can stress leaves—use the weakest mix that works and wipe/rinse afterward.6
Don’t clean in harsh direct sun
Wet leaves plus strong sun can increase spotting and scorch risk. Clean in the evening, early morning, or in bright shade.
Don’t ignore airflow
After rinsing, give the plant airflow so leaves dry faster. Lower humidity, reduce leaf wetness, and improve circulation if you’re dealing with leaf spot issues.9
A realistic cleaning routine (that prevents “plant chores” burnout)
- Every 1–2 weeks: quick dry dusting (30–60 seconds per plant).
- Every 4–8 weeks: deeper clean (damp wipe or shower rinse).
- Anytime you water: quick underside check for pests and sticky spots.
- Leaf type identified (smooth vs fuzzy vs succulent)
- Lukewarm water only
- Patch test any soap/vinegar/neem product
- Support big leaves from underneath
- Dry + airflow after rinsing
FAQ
How often should I clean houseplant leaves?
Most homes: dust every 1–2 weeks, deeper clean every 4–8 weeks. Clean sooner if heating/AC runs a lot or your plants sit near open windows, busy roads, or construction.
Is leaf shine spray bad for plants?
Some aerosols and oil-based polishes can cause issues, including residue buildup and leaf damage associated with aerosol exposure. RHS advises avoiding aerosols such as leaf shine products.4
If you want shine, clean leaves with water and a soft cloth, then buff dry.
What removes hard-water spots on leaves?
Start by preventing new spots (use distilled/filtered water where practical and avoid splashing foliage). For existing deposits, a diluted vinegar wipe can help: 1 tablespoon white vinegar per 1 quart of distilled or rainwater, patch test first, then follow with a plain-water wipe and a dry buff.5
Is dish soap safe to use on houseplant leaves?
Use it sparingly. Extension guidance notes that some dishwashing detergents can injure plants, so keep mixes weak, patch test, and rinse/wipe off after. For pest control, a labeled insecticidal soap is often a safer choice than household dish detergents.6
What’s the safest way to clean African violet leaves?
Use a soft, dry brush to lift dust. Avoid cold water splashes and avoid aerosol products on or near the plant.4
Sources
Outbound references used to support claims and safety guidance:
- Chaurasia M, Patel K, Tripathi I, Rao KS. (2022). Impact of dust accumulation on the physiological functioning of selected herbaceous plants of Delhi, India (PubMed).
- University of New Hampshire Extension (2021). Foliage houseplants: cleaning leaves guidance (lukewarm water, diluted soap, brushing).
- The Spruce (updated July 29, 2024). How to clean houseplant leaves (lukewarm water, low pressure, gentle soap ratios).
- Royal Horticultural Society (RHS) (updated 2026). Leaf damage on houseplants (cold water splashes, aerosol damage, avoid aerosols such as leaf shine products).
- Costa Farms. Healthy shiny houseplant leaves (vinegar ratio for hard-water deposits; what not to use on leaves).
- Colorado State University Extension (2025). Managing houseplant pests (insecticidal soaps; caution about plant injury from dishwashing detergents).
- National Pesticide Information Center (Oregon State University) (reviewed 2012). Neem oil fact sheet (label-first safety guidance and exposure considerations).
- Southern Living (updated Sept 19, 2025). Neem oil use notes (apply morning/evening; oils can contribute to foliage burn in sun).
- University of Maryland Extension (updated March 13, 2023). Fungal leaf spots on indoor plants (reduce leaf wetness time; increase air circulation).
- The Garden Professors. Vinegar use and safety notes (high-strength acetic acid can be hazardous; avoid overly strong mixes).
- The Guardian (Nov 18, 2025). Banana peel “leaf shine” test (temporary shine with potential sticky residue and mess on textured leaves).