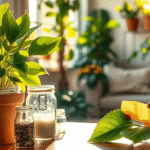
It started with a pothos that had been sitting in the same plastic nursery pot for far too long. The soil was almost gone — just a dense tangle of roots with barely any mix left around them. After a simple repot with fresh potting mix, the plant started pushing out new leaves again within a few weeks. Repotting doesn’t have to be a big event. Done right, it’s one of the most rewarding small jobs you can do for your plants.
This guide is for beginners who want to repot indoor plants without making a mess, choosing a pot that is too large, or accidentally overwatering afterward. It is especially useful for pothos, snake plants, spider plants, peace lilies, ZZ plants, and other common houseplants.
Quick Answer: The best time to repot most houseplants is during their active growing season in spring or early summer. Choose a new pot with drainage holes that is only 1 to 2 inches wider than the current one. Gently loosen the outer roots, place the plant in fresh indoor potting mix, and water thoroughly.
Best for: Beginner indoor plant owners
Time needed: 10–15 minutes per check
Main skills: Choosing the right pot, reducing mess, protecting roots, watering after repotting
Best season: Spring to early summer
Table of contents
- Why Your Houseplants Need Repotting
- When Is the Best Time to Repot?
- Selecting the Right Pot Size
- Ensuring Proper Drainage
- Preparing for a Mess-Free Repot
- Step-by-Step Repotting Method
- Special Situations
- Post-Repotting Care
- Final Thoughts on Repotting Houseplants
- FAQs
- Helpful Sources and Further Reading
Why Your Houseplants Need Repotting
A plant can look perfectly healthy on the outside while struggling underneath. Over time, potting mix breaks down, compacts, and loses the loose, airy texture roots need. The Royal Horticultural Society (RHS) notes that compost degradation reduces the volume of air reaching roots and can encourage disease — which is one reason repotting, or even just refreshing the top layer of compost, makes a real difference to long-term plant health.
Signs your plant has outgrown its pot
Repot when you see a clear root problem — not just because it’s been a while. Common signs to look for:
- Roots circling tightly when you slide the plant out, forming a dense coil or mat
- Roots poking out of drainage holes or visibly pushing up at the soil surface
- Water runs straight through the pot very quickly, because the pot is mostly roots and almost no soil
- The plant dries out noticeably faster than it used to in the same spot
- The plant tips over easily because it has become top-heavy
What actually improves after a repot
Done correctly, repotting improves three things that directly affect plant health: oxygen at the root zone, consistent moisture (neither soggy nor bone-dry), and available nutrients from a fresh mix. Better root conditions also reduce the risk of rot. Clemson’s Home and Garden Information Center explains that roots need both water and oxygen — when they sit in waterlogged soil for too long, they can’t access oxygen and may begin to rot. Fresh, well-structured compost in the right-sized pot makes it much easier to get that balance right.
When Is the Best Time to Repot?
For most houseplants, repotting during active growth gives roots the best chance to settle into the new mix quickly. The RHS advises that spring is ideal for repotting most plants, and that autumn and winter are worth avoiding because growth slows down and fresh compost can sit wet for much longer than it would in the warmer months.
Simple seasonal rule
Best time: spring through early summer. Avoid if possible: late autumn and winter — unless the plant is in genuine trouble, such as severe root rot, a cracked pot, or roots so tightly bound that the plant is clearly suffering.
A note on plant types
Some plants are quite comfortable in a snug pot for years — snake plants and ZZ plants are good examples. Fast growers like pothos and spider plants can fill a pot surprisingly quickly. When you’re unsure, do a root check: slide the plant gently out and have a look. If the roots are tightly circling and the mix is falling apart or drying out in odd patches, it’s time — regardless of what plant it is or what time of year it is.
Selecting the Right Pot Size
Pot size is where most repotting mistakes happen. Go too small and the plant dries out constantly. Go too large and the surrounding compost stays damp for too long, which increases the risk of root rot. The RHS is clear on this: for smaller containers, move up by only about 2.5–5 cm (1–2 inches) in width, and not much deeper. Bigger is not better when it comes to pots.
The one-size-up rule (with real numbers)
Use this as your default guide:
- Pot under 25 cm (10 in) wide: move up 2.5–5 cm (1–2 in) wider, and not much deeper
- Plant already in a large pot: consider refreshing the compost and lightly pruning roots in the same container, rather than sizing up again — especially for heavy floor plants that are difficult to move
Pot shape matters
Match the pot shape to how the plant grows:
- Deep pots: better for plants with a naturally deeper root system
- Wider, shallower pots: better for plants that spread laterally or produce offsets around the base
- Very deep pots in low light: be careful — extra depth means extra compost that can hold moisture for a long time with less evaporation
Plastic vs terracotta vs ceramic
Pot material changes how quickly the soil dries out — and that should drive your choice more than how the pot looks. Plastic holds moisture longer, which suits plants that like consistent dampness or are kept in drier indoor air. Terracotta is porous and allows the mix to dry faster through the walls, which is genuinely helpful if you tend to overwater. Glazed ceramic behaves more like plastic. Think about your watering habits first, then pick the pot.
Ensuring Proper Drainage
Drainage holes are non-negotiable
If water can’t escape from the bottom of the pot, it sits around the roots. Sitting water pushes out oxygen, and without oxygen, roots deteriorate quickly. This is why a pot with drainage holes — not just good intentions — is the foundation of healthy indoor plant care. No drainage hole is a problem, regardless of how carefully you water.
The rocks-at-the-bottom myth
It’s a well-meaning idea, but it doesn’t work the way most people think. Washington State University Extension explains that water won’t move easily from finer soil into a coarser layer below it — it tends to stay in the finer soil until that layer becomes fully saturated first. In practice, adding gravel or pebbles to the bottom of a pot can actually keep the soil above it wetter for longer. Skip the rocks. Use a good potting mix throughout the pot, and if you want to stop soil falling out of the drainage hole, cover it with a small piece of mesh or a coffee filter.
Using decorative pots safely
If your decorative pot has no drainage holes, treat it as a cachepot — a sleeve that the real pot sits inside — rather than the planting container itself:
- Keep your plant in a plain nursery pot with holes, and set that inside the decorative pot
- Water at the sink, allow it to drain fully, then place it back in the decorative outer pot
- Never leave standing water in the bottom of the outer pot — tip it out
If you’re comfortable drilling, adding a hole to a ceramic pot converts it into a proper planting pot. But for renters or anyone who’d rather not risk cracking a favourite pot, the nursery-pot-inside-cachepot method is a clean and practical solution.
Preparing for a Mess-Free Repot
Mess-free repotting is almost entirely about how you set up before you start. Once your workspace is contained — a tray, a folded bin bag, a shallow storage box — the process itself is surprisingly tidy. The cleaning at the end takes about two minutes.
Apartment-friendly setup checklist
- Work inside a large tray, shallow bin, or open bin bag spread flat — this catches almost everything
- Pre-moisten your potting mix slightly so it’s just damp (less dust, easier to handle, packs better around roots)
- Keep a small bowl for old soil and a separate bowl for fresh mix so things don’t get mixed up mid-process
- Have a damp cloth or small handheld vacuum nearby for the final tidy-up
What you’ll need
- New pot with drainage holes — or a nursery pot plus a decorative cachepot
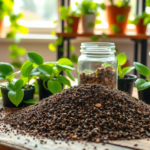
- Fresh potting mix suitable for indoor plants
- Clean scissors or snips for trimming dead or damaged roots
- A small piece of mesh or a coffee filter to cover the drainage hole (optional but useful)
- Gloves if you prefer — not essential, but some potting mixes contain perlite that can dry out skin
Clean your pots — it’s quick and worth it
If you’re reusing a pot, clean it before you plant anything in it. Iowa State University Extension recommends removing old soil, washing the pot, and soaking it in a solution of one part household bleach to nine parts water for at least 10 minutes, then rinsing thoroughly before use. It takes five minutes and removes any pathogens that could affect your plant’s new root growth.
Step-by-Step Repotting Method
Read through once, then follow it like a checklist. There’s no rush — the whole process for a small to medium houseplant should take 15 to 20 minutes.
Step 1: Water lightly the day before (optional but helpful)
If the plant is completely dry, water it lightly the day before you repot. A slightly moist rootball slides out more cleanly and is less likely to lose fine roots in the process. Avoid repotting when the pot is soaking wet — it’s messier and the roots can tear more easily.
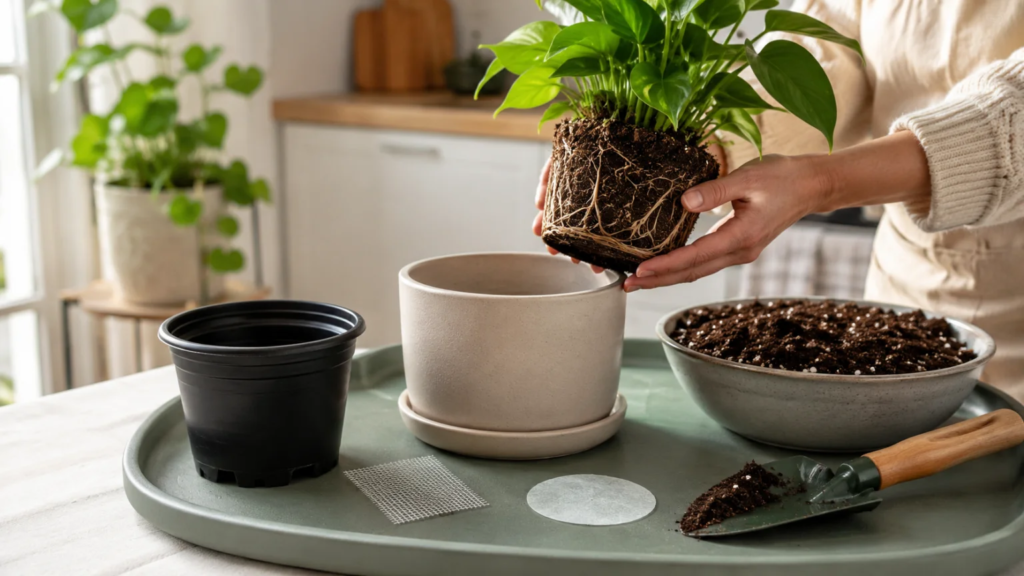
Step 2: Slide the plant out and check the roots
Support the base of the plant with one hand, tip the pot sideways, and ease the rootball out gently. Take a moment to look at what you’ve got:
- Healthy roots: firm, light-coloured (usually white or pale tan), no unpleasant smell
- Root rot: dark, soft, or mushy roots that smell bad — these need to be trimmed
- Tight binding: roots wrapped repeatedly around themselves — loosen these gently before repotting
Step 3: Trim only what needs it
Remove dead or mushy roots cleanly with snips. If the plant is rootbound, gently tease the outer ring of roots loose — the goal is to encourage them to grow outward into the new mix rather than continuing to circle. Don’t shred the whole rootball; just break up the very outer layer where it’s tightly coiled.
Step 4: Prepare the new pot
Cover the drainage hole with a piece of mesh or a coffee filter if you’d like to keep soil from washing out with every watering. Don’t add a layer of gravel or stones — as WSU Extension explains, this can actually keep the soil above it wetter than expected rather than improving drainage.
Step 5: Set the plant at the right height
Add a small amount of fresh mix to the bottom of the pot, then lower the rootball in and check that the plant sits at roughly the same soil level as it did before. You’re aiming to leave a small gap — about 2–3 cm — between the top of the soil and the rim of the pot. This is your “watering lip” — it stops water from spilling over the edge every time you water.
Step 6: Backfill and firm gently
Fill in around the sides with fresh potting mix. Press lightly to close obvious gaps and air pockets, but don’t compact it heavily — roots need air as well as moisture, and tightly packed soil works against that.
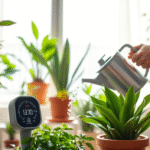
Step 7: Water once, then ease off
Water the plant thoroughly until a little drains from the bottom — this settles the mix around the roots and removes large air gaps. Then pull back: a newly repotted plant is surrounded by fresh, moisture-retaining compost and genuinely needs less frequent watering than usual for the first few weeks. Overwatering right after repotting is one of the most common reasons repotted plants decline. When in doubt, wait an extra day before watering again.
Special Situations
Large or heavy plants
If a plant is too heavy or awkward to lift safely, don’t force it — you risk injuring yourself and damaging the plant. There are other options that still help:
- Top-dressing: remove the top few centimetres of old compost and replace with fresh mix — this refreshes nutrients and improves the surface layer without moving the whole plant
- Same-pot refresh: if you can tilt the plant out just enough, trim a small amount of outer roots and repot it back into the same container with fresh mix packed around it
- Plant dolly: a wheeled base under a heavy pot makes it much easier to move when you do need to repot fully
Delicate or easily stressed plants
Some plants — certain ferns, orchids, and peace lilies, for example — can droop, yellow, or drop leaves after even a careful repot. That’s normal. Keep disruption minimal: don’t aggressively tease the roots, don’t fertilize for at least three to four weeks, and move the plant to a spot with bright indirect light rather than direct sun while it adjusts. Most recover within a couple of weeks once root contact with the new mix is established.
Post-Repotting Care
First-week recovery mode
The week after repotting is about stability, not stimulation:
- Keep the plant in bright, indirect light — avoid harsh direct sun for the first week or so
- Water only when the plant reaches its usual “time to water” point — check the soil rather than sticking to a fixed schedule, since fresh compost holds moisture longer
- Hold off on fertiliser for two to four weeks, unless you’re using a completely inert growing medium such as leca or perlite, which contain no nutrients of their own
Common repotting mistakes and quick fixes
- Pot too large (overpotting): compost stays wet for days → water very sparingly until the mix dries out; size down at the next repot if the problem continues
- Rocks at the bottom: soil stays wetter than expected → remove the layer at the next repot and use mix throughout
- Overwatering after repotting: yellowing leaves and limp growth → pause watering and allow the mix to dry appropriately; roots are asking for oxygen, not more water
Final Thoughts on Repotting Houseplants
Repotting isn’t about finding the biggest pot you can and stuffing your plant into it. It’s about keeping the root zone breathable, the moisture level manageable, and the compost fresh enough to actually support growth. If you remember just three things, you’ll avoid most of the common problems: repot mainly in spring or early summer, move up only slightly (around 2.5–5 cm wider for smaller pots), and always use a pot with a drainage hole.
Once you’ve done it a couple of times, it becomes a calm habit rather than a stressful project: protect the workspace, check the roots, refresh the compost, water once to settle it in, then ease off. Plants don’t send thank-you notes, but new growth is the next best thing.
FAQs
How often should I repot my houseplants?
There’s no fixed schedule that works for every plant. Many houseplants benefit from repotting or a compost refresh every two to three years. The RHS notes that compost degrades and compacts over time — so even if a plant hasn’t outgrown its pot in size, the mix itself may need refreshing. Let the roots and the condition of the soil guide you more than the calendar.
What size pot should I move up to?
Only slightly larger. The RHS recommends a pot around 2.5–5 cm (1–2 inches) wider than the current one for smaller containers, and cautions against overpotting because compost in an oversized pot can stay wet for too long — especially in lower light conditions.
Do I need rocks at the bottom for drainage?
No. WSU Extension explains that adding a coarse layer at the base of a fine-soil container can actually slow water movement and keep the soil above it wetter than expected. Use a good quality potting mix throughout the pot, and rely on a proper drainage hole to do the actual draining.
Can I repot in winter?
You can if the plant genuinely needs it — severe root rot, a cracked pot, or roots in crisis don’t wait for spring. But it’s not ideal. The RHS advises avoiding autumn and winter repotting when possible because slower growth means the plant takes longer to adjust, and fresh compost can stay wet much longer without roots actively drinking it down. If you do repot in winter, keep the pot size modest and water with extra care.
Should I fertilise right after repotting?
Usually not. Most quality potting mixes already contain nutrients, and roots that have just been disturbed can be sensitive. The bigger risk immediately after repotting is overwatering, not under-feeding. Wait two to four weeks before introducing fertiliser, and focus on steady indirect light and careful watering in the meantime.
My plant looks droopy after repotting — is something wrong?
Some temporary wilting or leaf droop after repotting is normal, especially if the roots were disturbed. It’s the plant adjusting to the change. Give it bright indirect light, hold off on fertiliser, and be careful not to overwater. Most plants recover within one to two weeks once the roots begin to make contact with the new mix. If drooping continues beyond that or you notice mushy stems, check the soil — overwatering is the most likely cause.
Helpful Sources and Further Reading
- RHS: How to repot a plant
- RHS: Overpotting
- RHS: How to grow houseplants
- WSU Extension (Chalker-Scott): The Myth of Drainage Material in Container Plantings (PDF)
- Clemson HGIC: Indoor Plants – Watering
- Iowa State University Extension: How to Clean and Disinfect Plant Containers