There’s a particular moment with a Monstera that most owners recognise: you water it, come back in two days, and the soil is already dry again. Or you notice the newest leaves are smaller than the ones before them — fewer splits, less drama, just a quiet stall. These are the plants trying to tell you the pot has run out of room. Knowing when to listen makes the difference between a Monstera that grows steadily and one that just… exists.
This guide gives you seven clear signs to look for, a simple repotting plan you can follow in under an hour, and the aftercare steps that prevent most post-repot problems. If you’ve never repotted a plant before, this is a good one to start with — Monsteras are forgiving, and the process is more straightforward than it looks.
Quick Answer: Repot your Monstera when roots are growing out of the drainage holes, the soil dries out much faster than it used to, or new leaves are consistently smaller. Only repot using a container that is one to two inches larger in diameter, and always use a well-draining potting mix.
A good rule is to repot only when the plant shows clear signs, not just because a year has passed. If the roots still have room and the soil drains well, your Monstera can usually stay in the same pot longer.
Best for: Monstera owners who are unsure whether their plant is root-bound or ready for a larger pot
Time needed: 20–40 minutes for most small to medium Monsteras
Main skills: Checking roots, choosing pot size, refreshing soil, supporting climbing growth
Best season: Spring to early summer, unless the plant has urgent root rot or stability problems
Important: Do not move a Monstera into a much larger pot “to give it room.” Oversized pots hold extra wet soil around the roots and can increase the risk of root rot.
Table of contents
- Quick answer: when should you repot?
- Understanding Monstera growth habits
- 7 signs your Monstera needs a new pot
- Repotting schedule by age and season
- Choosing the right pot size and soil mix
- Safety note: pets, children, and skin
- Step-by-step repotting plan
- Aftercare: the first 2–4 weeks
- Common repotting mistakes to avoid
- Troubleshooting problems after repotting
- Final Thoughts on Repotting Monsteras
- FAQs
- Sources and further reading
Quick Answer: When Should You Repot a Monstera?
Repot your Monstera when two or more of these are true at the same time:
- Roots are coming out of the drainage holes or visibly circling when you slide the plant out
- The pot dries out noticeably faster than it used to — you’re watering far more often in the same season and same spot
- New leaves are arriving smaller than before, with fewer splits, or growth has stalled entirely
- Water either pools on the surface or rushes straight through without soaking in
- The plant is top-heavy and tips despite being staked
- There’s visible white or grey crust on the soil surface and the mix smells stale or sour
If none of those apply, you usually don’t need to repot yet. Focus on refreshing care instead — check light, adjust watering, add a support stake, or top-dress with a little fresh mix.
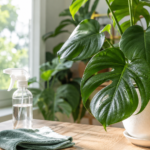
Understanding Monstera Growth Habits
Monstera deliciosa is a tropical climbing plant — a liana — native to Central and South America. In its natural habitat it uses trees for support and sends out aerial roots as it climbs. According to Kew’s Plants of the World Online and the University of Wisconsin-Madison Extension, this climbing habit is worth understanding because it means your plant is doing two jobs at once indoors: building leaves above the soil and roots below it. When the pot gets crowded, both slow down together.
This climbing habit also explains why a support pole is worth considering at repotting time. Installing a moss pole or stake is much easier when the pot is empty and the root mass is manageable — far simpler than trying to push a pole through a dense, established root ball later.
7 Signs Your Monstera Needs a New Pot
Use these signs like a checklist. One sign on its own isn’t always a reason to repot — but two or more together usually are.
Roots growing through drainage holes
If roots are poking out the bottom, or you slide the plant out and find them spiralling tightly around the outside of the root ball, your Monstera is pot-bound. It’s not an emergency, but it does mean water and nutrients are increasingly hard to distribute evenly. The Spruce notes this as one of the clearest signals to size up.
Soil drying out unusually quickly
When roots dominate the pot, there’s less soil left to hold moisture. If you’ve gone from watering every 10–14 days to every 4–7 days in the same season and the same spot, your plant may simply be outgrowing the pot. Always confirm with a root check first — faster drying can also come from a change in light, temperature, or pot material.
Growth slowing or new leaves getting smaller
Monsteras can stall quietly when crowded. A common pattern is that the plant still looks fine overall, but new leaves arrive smaller than the last few, with fewer splits and fenestrations, or the time between leaves stretches noticeably. A plant that used to put out a new leaf every three weeks and is now taking eight weeks is telling you something.
Water pooling on top or rushing straight through
Both extremes point to a pot that’s lost its ability to buffer moisture properly:
- Pooling on top usually means the mix has become compacted and water-repellent — it beads on the surface rather than soaking in
- Rushing straight through usually means the rootball is so dense that water bypasses the soil entirely and exits at the bottom almost immediately
Either way, the mix is no longer doing its job, and watering becomes guesswork.
Yellowing leaves after ruling out other causes
If older leaves are yellowing more frequently and you’ve already checked the basics — light levels, watering habits, and pests — then depleted soil could be part of the picture. Old mix loses its structure and nutrient availability over time. Repotting refreshes all of that at once: aeration, drainage, and a clean nutritional baseline.
The plant keeps tipping over
As Monsteras grow tall and leafy, the pot can become a tipping hazard — especially if the rootball is so tight and compacted that it can’t anchor the plant properly. A slightly larger, heavier pot combined with a proper support pole usually solves this immediately.
Visible mineral crust or stale-smelling soil
White or grey crust on the soil surface or around the pot rim indicates mineral buildup from tap water and fertilizer. You can sometimes manage this by flushing the soil thoroughly with water, but if the mix is old and breaking down on top of the buildup, a full repot into fresh mix is usually more effective and longer-lasting.
| What you notice | What it usually means | What to do |
|---|---|---|
| Roots coming out the bottom | Pot-bound | Repot one size up |
| Drying out much faster than before | Too many roots, not enough soil | Confirm with root check, then repot |
| Water pools or runs straight through | Compacted mix or overly tight rootball | Repot and refresh soil structure |
| Plant tipping despite staking | Pot too small for the plant’s size | Heavier pot plus a proper support pole |
Repotting Schedule by Age and Season
A schedule is useful as a baseline, but the signs above should always be the final decision. University of Wisconsin-Madison Extension and The Spruce both note that Monsteras are generally repotted around every one to two years, with younger, faster-growing plants sometimes needing it more frequently.
Best season: spring through early summer works well because the plant is naturally entering its active growth phase and recovers faster. Avoid repotting during cold, dark months unless the plant is in genuine trouble — root rot, severe pot-binding, or a stability problem that can’t wait.
A simple schedule by plant stage
- Small or young Monstera (1–3 years): check the root zone every 12 months and repot when the signs show
- Mature Monstera: check every 18–24 months and repot when the soil structure breaks down or roots become crowded
- Very large specimens: consider yearly top-dressing (replacing the top 2–5 cm of soil with fresh mix) and do full repots less often — lifting a large Monstera out of a heavy pot is genuinely hard work
Choosing the Right Pot Size and Soil Mix
Pot size: the one-size-up rule
The most common repotting mistake is jumping to a pot that’s too large. An oversized pot holds more wet soil than the roots can use, which raises the risk of root rot — especially in lower light conditions where soil dries slowly. Better Homes & Gardens suggests a practical guideline that works well for Monsteras:
- Current pot 25 cm (10 in) or smaller: go up 2.5–5 cm (1–2 in) in diameter
- Current pot larger than 25 cm (10 in): go up 5–7.5 cm (2–3 in) in diameter
This gradual approach also suits Monsteras specifically, because they do best in a mix that dries predictably — not one that stays wet for weeks around under-used soil.
Drainage is non-negotiable
Use a pot with drainage holes, and empty the saucer after every watering. Drainage allows excess water to escape and lets oxygen reach the root zone — both are essential for a healthy Monstera. A beautiful pot with no drainage hole is a cachepot, not a planting container; keep the plant in a nursery pot and set it inside the decorative one.
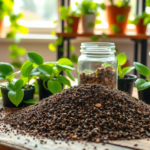
What soil mix works best
Monsteras do well in a mix that retains some moisture but drains freely and stays loose enough for roots to breathe. University of Wisconsin-Madison Extension recommends a rich potting soil as the base. If you want to improve drainage and aeration, the simplest approach is to mix a quality indoor potting soil with added perlite or bark.
For those who want something chunkier, here’s a simple DIY mix that works well:
- 2 parts indoor potting mix
- 1 part orchid bark or chunky pine bark
- 1 part perlite or pumice
- Optional: a small handful of horticultural charcoal to help keep the mix fresher between repots
If you’d rather keep it simple, a good-quality potting mix cut with perlite and a little bark does the job without chasing a complicated recipe.
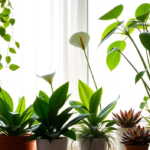
Safety Note: Pets, Children, and Skin
Monstera is considered toxic if chewed by cats and dogs, and can cause mouth and throat irritation in humans too. The ASPCA lists it as toxic to both cats and dogs. Wear gloves if you have sensitive skin, wash hands after handling the plant, and make sure any pruned leaves or aerial roots go straight into the bin rather than sitting where a pet could investigate them. The Royal Horticultural Society (RHS) also notes the irritant compounds in Monstera sap, particularly around freshly cut aerial roots.
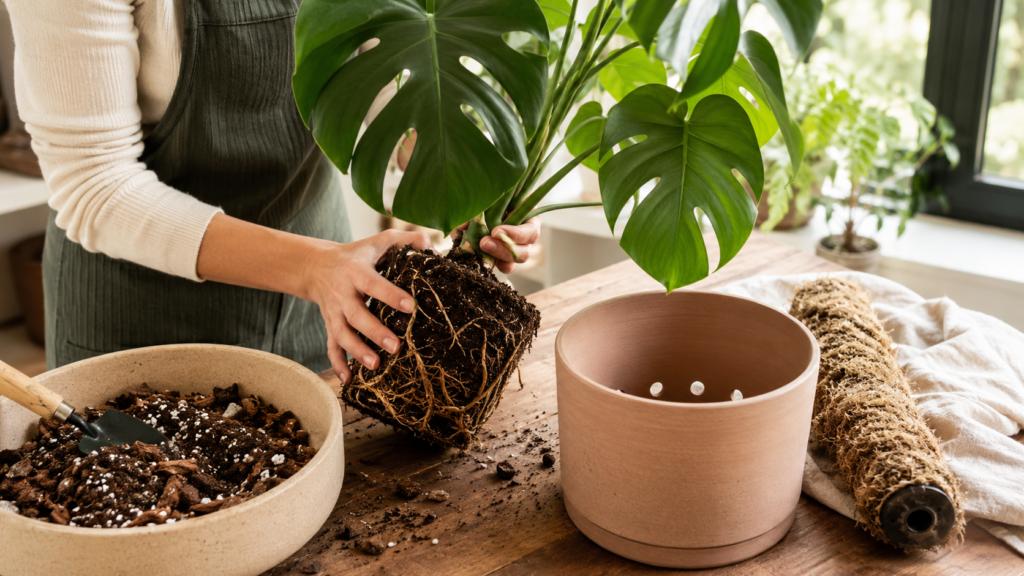
Step-by-Step Repotting Plan
Read through once before you start, then follow it like a checklist. Most Monsteras take 20–40 minutes to repot, depending on their size and how root-bound they are.
Step 1: Water lightly the day before (optional but helpful)
If the plant is very dry, a light watering the day before makes the rootball easier to slide out and reduces stress on fine roots. Don’t repot when the soil is soaking wet — it’s messier and roots are more likely to tear.
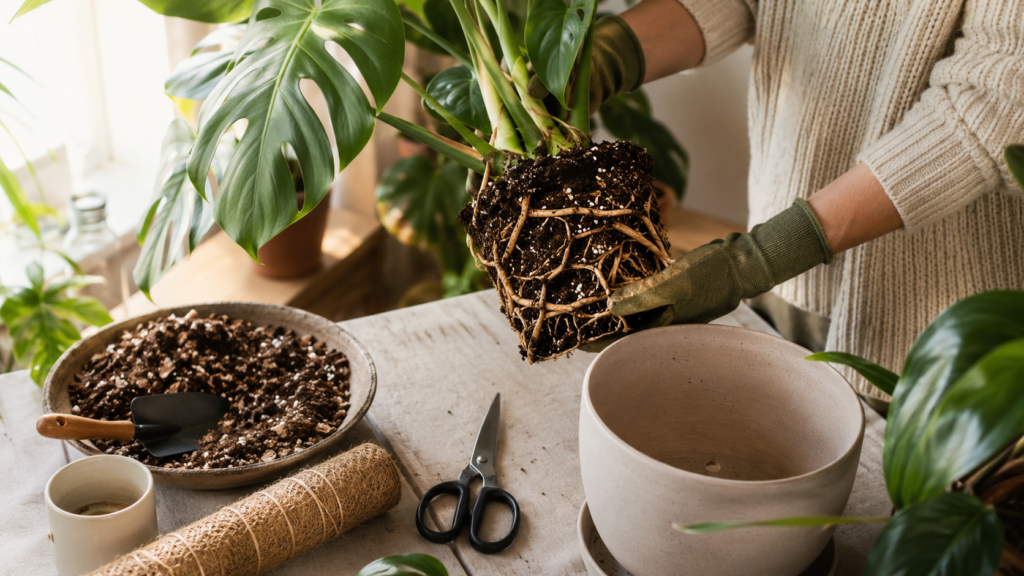
Step 2: Set up your workspace
Gather what you need before you start — once the plant is out of the pot, you want everything at hand:
- New pot with drainage holes
- Fresh potting mix (pre-mixed and ready)
- Gloves
- Clean scissors or pruners
- A tray or large sheet of paper to work on
- Moss pole or stake and soft ties, if you’re adding support
Step 3: Remove the plant carefully
Lay the pot on its side and ease the plant out gently. If it’s stuck, squeeze a plastic nursery pot gently to loosen it, or run a blunt knife around the inside edge of a rigid pot. Never pull the plant out by the stems — you’ll snap them before the roots release.
Step 4: Inspect roots and untangle gently
Healthy roots are firm and usually pale white, cream, or light tan. Rotten roots are dark, mushy, and often smell unpleasant. Gently loosen the outer ring of circling roots — the goal is to encourage them to grow outward into the new mix rather than continue spiralling. If you find rot, trim it back to healthy tissue with clean tools and discard the old wet soil around it.
Step 5: Install support now, not later
If you’re adding a moss pole or stake, place it near the back of the new pot before you start backfilling. Pushing a pole through a freshly packed root zone is much harder than positioning it on an empty pot. Once in place, tie stems gently with soft ties — snug enough to guide the plant, loose enough not to restrict growth.
Step 6: Position at the right depth
Add a little fresh mix to the bottom of the new pot, then lower the rootball in and check that the plant sits at roughly the same soil depth as before. Burying the stem too deep can cause rot at the base. Leave a small gap — about 2–3 cm — between the top of the soil and the rim of the pot so water doesn’t overflow when you water.
Step 7: Backfill, tap, and water once
Fill in around the rootball with fresh mix, tapping the pot gently on a flat surface to settle air pockets. Press lightly but don’t compact the soil heavily — roots need both moisture and airflow. Water thoroughly once until it drains from the bottom, then empty the saucer. After that initial watering, wait until the top layer starts to dry before watering again. University of Wisconsin-Madison Extension and the RHS both note that Monsteras prefer to dry slightly between waterings, and this is especially true right after repotting when the fresh mix holds more moisture than the plant immediately needs.
Aftercare: The First 2–4 Weeks
Most repotting problems come from what happens in the weeks after, not the repot itself. The main risk is overwatering into fresh mix when the plant is already slightly stressed. The calm approach is to change as little as possible and let the plant settle in.
- Light: keep it in the same bright, indirect light it’s used to — avoid harsh direct sun for at least the first week
- Water: slightly less frequent than usual; fresh mix holds moisture longer, so check before watering rather than going by habit
- Humidity: normal room humidity is fine, but steadier humidity helps reduce drooping during the adjustment period
- Fertilizer: wait 2–4 weeks before feeding — the RHS advises giving roots time to recover before adding the extra demand of processing nutrients
| Time after repotting | What’s normal | What to avoid |
|---|---|---|
| Days 1–7 | Mild droop, slower water uptake | Watering again “to help it recover” |
| Week 2 | Leaves perk up, soil drying pattern stabilises | Moving the plant to a new spot |
| Weeks 3–4 | New growth may resume | Heavy fertilizer doses |
Common Repotting Mistakes to Avoid
Choosing a pot that’s too large
Go up gradually — one or two sizes, not a big jump. A large pot holds excess moisture that roots can’t reach quickly, and that wet unused soil is where root rot typically starts. Better Homes & Gardens specifically flags overpotting as one of the most common container care mistakes.
Using dense soil with no aeration
Standard indoor potting mix straight from the bag can be too dense for Monsteras, especially in low-light conditions where it stays wet longer. Adding perlite, orchid bark, or a handful of pumice makes a real difference to drainage and root oxygen access.
Watering on the same schedule as before
Fresh mix holds moisture differently to old, compacted soil. Check the soil with a finger before watering after a repot — the top layer should feel dry or close to it before you add more water. University of Wisconsin-Madison Extension notes that Monsteras prefer to dry slightly between waterings, and new mix amplifies this.
Skipping tool and pot cleaning
Dirty pruners or a reused pot that hasn’t been washed can introduce pathogens into fresh soil. If you’re reusing a pot, wash it out and soak it for 10 minutes in a dilute bleach solution (1 part bleach to 9 parts water), then rinse before using it again.
Troubleshooting Problems After Repotting
If something looks off in the days after repotting, don’t reach for fertilizer or water immediately. Work through this checklist first:
- Droop with dry soil: water thoroughly and let drain — the plant is thirsty and adjusting
- Droop with wet soil: pause watering, increase airflow, and confirm the drainage hole is clear and functioning
- Yellowing spreading quickly: slide the plant out and check the roots for rot — mushy roots and a sour smell mean the soil is staying too wet; repot again into a drier, chunkier mix if needed
- Fungus gnats appearing: let the soil dry more thoroughly between waterings; a layer of coarse sand or grit on the surface can also disrupt their egg-laying cycle
Final Thoughts on Repotting Monsteras
Repotting a Monstera is less about following a calendar and more about reading the plant. When the roots are running out of room, the soil is tired, or the structure has broken down, a fresh pot and new mix gives everything a reset — better drainage, better aeration, and room for roots to grow again.
The steps themselves are straightforward once you’ve done it once: one size up, airy mix, good drainage, water once to settle, then ease back and let the plant find its footing. Most Monsteras bounce back quickly. You’ll usually see the first signs of new growth within three to four weeks — and that first unfurling leaf after a repot always feels worth the afternoon’s work.
FAQs
How often should I repot my Monstera?
Many Monsteras do well repotting every one to two years when young, and less frequently as they mature and grow slower. University of Wisconsin-Madison Extension notes this general rhythm, though the signs above — root crowding, stalled growth, faster drying — should always be the actual trigger rather than a fixed date on the calendar.
Do I need to break up the root ball?
Usually you only need to loosen the outer ring of circling roots and gently tease apart any that are spiralling tightly. Aggressive root pruning is reserved for cases of root rot or extreme pot-binding — in a straightforward repot, minimal intervention is better. The goal is to encourage outward root growth, not to restructure everything at once.
Can I repot a Monstera in winter?
Spring and early summer are easier because the plant is in active growth and adjusts faster. That said, if the Monstera is in genuine trouble — root rot, severe pot-binding, or tipping so badly it’s a hazard — winter repotting is better than leaving it. If you do repot in winter, be extra conservative with watering afterward and keep conditions stable. The RHS recommends avoiding unnecessary repotting during cold months when growth is slow.
Do I need a moss pole when I repot?
You don’t have to, but repot day is genuinely the easiest time to install one. Monsteras are natural climbers and tend to produce larger leaves with more fenestrations when they have something to grow up. Installing a pole into an empty pot is straightforward; trying to add one later, through an established rootball, is awkward and risks damaging roots. If you’re considering a pole at all, do it now.
Is Monstera safe around pets?
No — the ASPCA lists Monstera as toxic to both cats and dogs if chewed or ingested. It can also irritate human skin and mucous membranes. Keep the plant out of reach, wear gloves when handling it, and dispose of any prunings promptly rather than leaving them where a curious pet could investigate.
My Monstera drooped right after repotting — is something wrong?
Mild drooping in the first few days after repotting is normal and usually not a sign of a problem. The plant is adjusting to new soil, a slightly different moisture pattern, and some root disturbance. Check the soil before doing anything — if it’s dry, water it; if it’s still moist, leave it alone and give it a few days. Most Monsteras perk up within a week once roots begin making contact with the new mix.
Sources and Further Reading
- Kew – Plants of the World Online: Monstera deliciosa
- University of Wisconsin-Madison Extension – Monstera
- The Spruce – Monstera deliciosa growing guide
- Better Homes & Gardens – Containers for houseplants
- Royal Horticultural Society (RHS) – Monstera deliciosa
- ASPCA – Swiss Cheese Plant toxicity