There’s a moment most plant owners recognise: you water a peace lily, it perks up, and a few days later it droops again. The instinct is to water again, but sometimes the real issue is the opposite — the roots are staying too wet in a mix that never drains properly. That is why the method you use to water matters almost as much as the schedule itself: the goal is not just to add water, but to wet the root zone evenly and let the excess drain away.
Top watering is the classic approach — water goes in from above, drains out below. Bottom watering works in reverse — the pot sits in water and draws moisture up through the drainage holes. Both methods work well. The one that’s right for you depends on the plant, the mix, and the problems you’re trying to avoid. This guide breaks both down with practical steps, a clear decision table, and some honest troubleshooting for when things go wrong.
Quick Answer: Top watering is best for most routine houseplant care because it wets the root zone and helps flush fertilizer salts from the soil. Bottom watering is better for plants with sensitive leaves or crowns, very dry soil that will not absorb water from above, or fungus gnat problems where you want the soil surface to stay drier. For most homes, the smartest routine is to top water normally and use bottom watering when a specific plant or problem needs it.
Best for: Beginner indoor plant owners comparing top watering and bottom watering
Time needed: 5–10 minutes for top watering, 10–30 minutes for bottom watering
Main skills: Choosing the right watering method, checking drainage, preventing salt buildup, avoiding overwatering
Best method: Use top watering as the default, then bottom water when a specific plant or problem needs it
Important: Bottom watering does not mean leaving a plant sitting in water for hours. Soak only until the mix is evenly moist, then remove the pot and let it drain fully.
Table of contents
- Quick answer: which method should you use?
- Why your watering method affects plant health
- Top watering explained
- Bottom watering explained
- The real differences that matter
- Plant-by-plant guidance
- A hybrid routine that works for most homes
- Water quality: quick myth check
- Troubleshooting common watering problems
- Final Thoughts on Watering Methods
- FAQs
- Sources and further reading
Quick Answer: Which Method Should You Use?
| If you have… | Use this more often | Why |
|---|---|---|
| Plants prone to crown or leaf issues (e.g., African violets) | Bottom watering | Keeps water off sensitive crowns and leaves, reducing spotting and rot risk |
| Very fast-draining chunky mixes (orchid bark, aroid mix) | Top watering | Water moves through quickly and flushes accumulated salts at the same time |
| Persistent fungus gnats and a constantly damp surface | Bottom watering + let top dry | Fungus gnats prefer moist surfaces; keeping the top layer drier helps disrupt them |
| White crust on soil or pot rim | Top watering (flush) | Watering until it drains well leaches soluble salts from the mix |
| Busy schedule and a tendency to overwater | Bottom watering (with a timer) | Gives you a clear start and stop: soak for a set time, remove, drain, done |
Quick Answer: Top watering is best for most routine houseplant care because it wets the root zone and helps flush fertilizer salts from the soil. Bottom watering is better for plants with sensitive leaves or crowns, very dry soil that will not absorb water from above, or fungus gnat problems where you want the soil surface to stay drier. For most homes, the smartest routine is to top water normally and use bottom watering when a specific plant or problem needs it.
Why Your Watering Method Affects Plant Health
Watering isn’t just about frequency — it’s about whether the entire root zone is getting wet evenly, whether excess water can escape quickly, and whether you’re accidentally creating the conditions for problems: stagnant wet soil, salt buildup, wet crowns, or dry pockets that water never reaches. Getting those things right matters more than which day of the week you water.
Signs your method (not just your schedule) needs adjusting
| What you see | Usually means | Fix |
|---|---|---|
| Yellow leaves, soft stems, soil smells sour | Overwatering or low oxygen at roots | Let soil dry out, improve drainage, shorten soak time (bottom) or water more slowly (top) |
| Wilting, crispy edges, soil pulling away from pot | Underwatering or dry pockets in the mix | Do a thorough soak-and-drain once, then settle into a consistent method |
| White or grey crust on soil surface or pot rim | Soluble salt buildup from fertilizer or hard water | Flush by top-watering generously until water drains freely; repeat occasionally |
| Fungus gnats hovering near constantly wet soil | Surface layer staying too moist for too long | Let the top layer dry more between waterings; try bottom watering |
Top Watering Explained
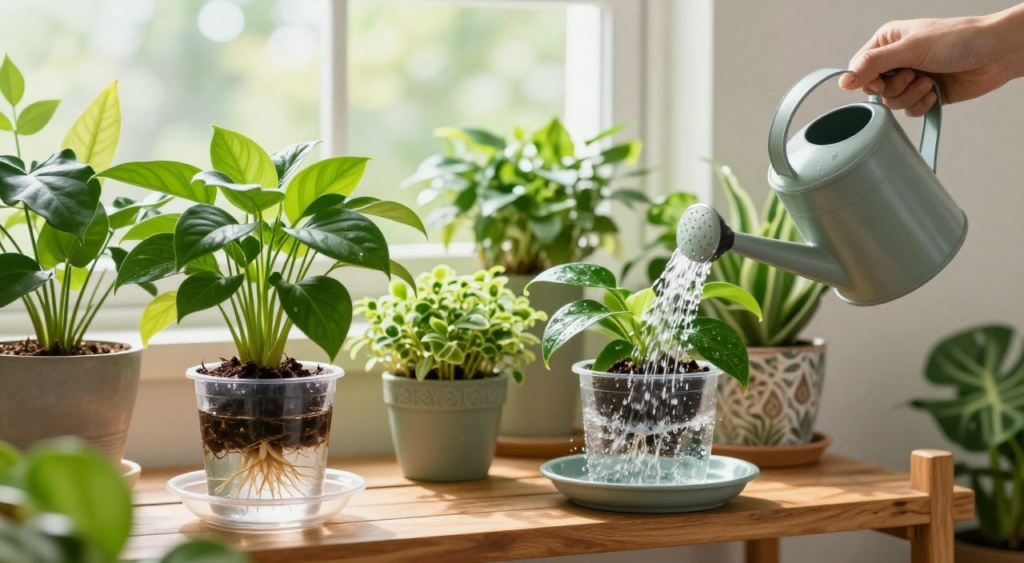
Top watering means pouring water slowly onto the soil surface until the root zone is fully moistened and excess water runs out of the drainage hole at the bottom. It’s the default method for most houseplants, and it’s also the easiest way to flush accumulated salts from the potting mix when needed — something bottom watering alone can’t reliably do.
How to top water properly
- Check before you water: lift the pot (a noticeably light pot is usually ready) and feel the top 2–3 cm of soil. Don’t water just because it’s been a few days.
- Pour slowly over the soil surface — avoid blasting the mix with a strong stream, which compacts it and can push water down just the edges rather than through the whole root zone.
- Water until it drains from the bottom. This confirms the full root zone got wet and helps avoid the dry pockets that form in the middle of the pot when you water too quickly.
- Empty the saucer after 5–10 minutes. Letting pots sit in pooled runoff is one of the most overlooked causes of root rot in otherwise well-cared-for plants.
- Every 4–6 weeks (or when you notice crusty salt buildup), do a proper flush — water generously with good drainage — especially if you fertilize regularly.
Top watering works best for
- Most standard houseplants in well-draining potting mix
- Plants in chunky mixes like aroids and orchids, where water needs to move through freely
- Anyone who fertilizes, because it gives you a regular opportunity to flush salts before they accumulate
Bottom Watering Explained
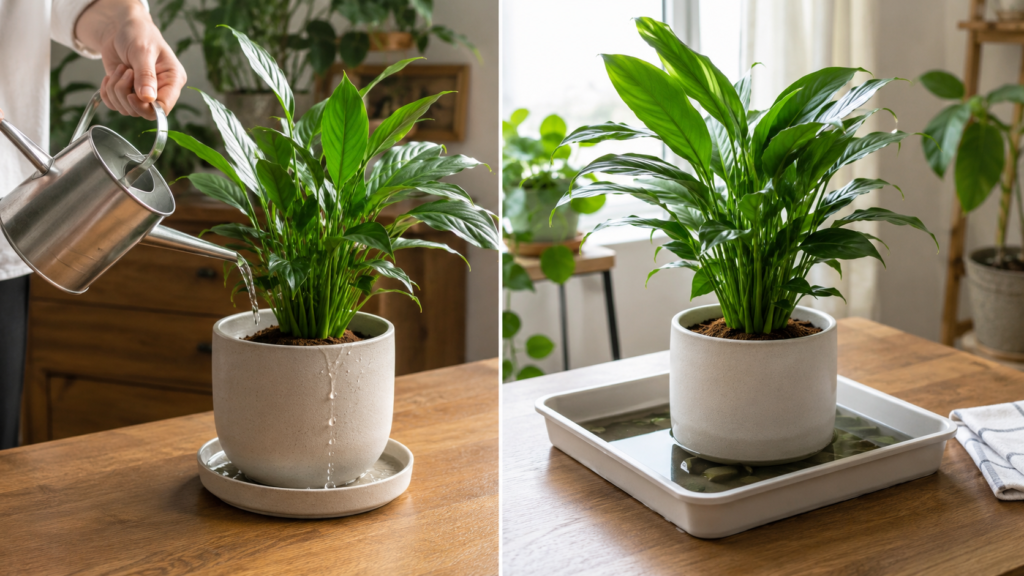
Bottom watering means setting the pot in a shallow tray of water and letting the mix draw moisture upward through the drainage holes by capillary action. The water never touches the leaves or the crown of the plant, and the soil surface stays drier than it would with top watering. Done correctly, it’s a calm and controlled method — though it does require a bit more attention to timing.
From personal experience, bottom watering changed things for some of the fussier plants in a collection. A calathea that had been browning at the edges and getting slightly droopy between waterings became noticeably more stable once it was soaked from below every 10 days or so. The soil stayed evenly moist throughout rather than wet on top and dry in the middle. It’s not a magic fix — drainage still has to be good — but for certain plants and certain mixes, it genuinely does a better job of wetting the whole root zone consistently.
How to bottom water properly
- Use a clean tray or basin. Add water to about 2–4 cm depth — enough to reach the drainage holes at the base of the pot.
- Place the pot in the tray and set a timer so you don’t forget about it.
- Soak time: roughly 10–15 minutes for small pots (under 12 cm), 20–30 minutes for medium pots (13–18 cm), and up to 45 minutes for larger pots or mixes that were very dry going in.
- Remove the pot when the top of the mix feels evenly damp when you press it lightly — not waterlogged, just consistently moist. Let it drain on a rack or in the sink for a minute before returning it to its spot.
- Never leave a pot sitting in water for hours. Bottom watering is controlled soaking — leaving it overnight turns it into the same problem as a pot with no drainage.
Bottom watering works best for
- African violets and other plants where water on the crown or leaves causes spotting or rot — NC State Extension specifically notes that African violets do well when watered from below
- Plants with tight, root-bound rootballs or mixes that have become hydrophobic, where water from the top just runs down the edges without soaking in
- Homes dealing with fungus gnats, as part of a strategy that keeps the surface layer drier between sessions
The Real Differences That Matter
Moisture distribution
Top watering can miss dry pockets if you water too quickly or if the mix has become water-repellent — water finds the easiest path and runs down the sides of the pot rather than through the middle. Bottom watering is often better at rehydrating a dry rootball evenly because the moisture moves upward gradually, wicking into the mix from all directions.
Salt buildup — the one people overlook
When you fertilize or use mineral-heavy water, soluble salts accumulate in the potting mix over time. University of Illinois Extension recommends leaching — watering generously until water drains freely — as a way to reduce that buildup. If you bottom water exclusively, you’re never flushing the mix from above, which means salts can concentrate and eventually damage roots.
The practical fix is simple: if you mainly bottom water, top water once every 4–6 weeks until water runs freely from the drainage hole. That one habit gives you most of the benefits of both methods.
Fungus gnats and disease
Fungus gnats lay eggs in moist soil near the surface. Keeping the top layer of your potting mix consistently dry is one of the most effective ways to disrupt their cycle — Extension.org notes that moist potting media surfaces are strongly linked to fungus gnat problems. Bottom watering can help with this, but only if you’re not over-soaking, and only if you’re not leaving standing water in the tray afterward.
Time and practicality
Top watering is faster per plant. Bottom watering takes longer per session but can be more hands-off if you’re soaking several pots together in a larger basin — set a timer and do something else for 20 minutes. For most people with a mix of plant sizes and types, a combination of both methods is the most practical long-term approach.
Plant-by-Plant Guidance
| Plant group | Easiest method | Notes |
|---|---|---|
| African violets | Bottom watering | Avoid wetting the crown and leaves; reduces spotting and crown rot risk |
| Succulents and cacti | Top watering (thorough, then dry completely) | Either method works; the critical point is letting the mix dry fully before watering again — never leave sitting in water |
| Ferns, peace lily, tropical foliage plants | Top or bottom | Choose whichever keeps moisture steady without waterlogging; avoid soaking for too long with bottom watering |
| Plants with fungus gnat problems | Bottom watering + allow surface to dry | Reduces the consistently moist surface that gnats prefer for egg-laying |
| Orchids and very chunky mixes | Top watering | Water should move through the bark quickly; don’t leave bark sitting wet — it needs to dry out between waterings |
A Hybrid Routine That Works for Most Homes
Small practical note: If you own many plants, do not bottom water everything at once unless they have similar needs. A small pothos, a fern, and a cactus should not sit in the same water tray for the same length of time. Group plants by pot size and moisture needs, then use a timer.
If you’d rather not think too hard about which method to use each time, this simple hybrid covers the vast majority of houseplants without complications:
- Default: top water slowly until water drains from the bottom, then empty saucers after 5–10 minutes
- Switch to bottom watering for plants with sensitive crowns (African violets), or any time a pot has dried so thoroughly that top-watering runs straight through without soaking in
- Monthly flush: top water generously — more than usual, with good drainage — if you fertilize or notice white crust forming on the soil or pot rim
That’s it. No complicated charts per plant. The key rule that holds everything together is non-negotiable: always use pots with drainage holes, and never leave standing water underneath a pot for extended periods.
Water Quality: A Quick Myth Check
You’ve probably read that leaving tap water out overnight makes it safe for plants. It’s not bad advice, but it’s incomplete. Some municipal water systems use free chlorine, which does off-gas over time if left sitting in an open container. But many systems now use chloramine instead, which is more chemically stable and does not evaporate the same way — the US EPA notes that chloramine lasts longer in distribution systems precisely because of its stability.
Boiling water is sometimes suggested as an alternative, but boiling doesn’t remove chemical contaminants and can actually concentrate some of them, according to Idaho DEQ. The most practical option for plants that seem sensitive to tap water — showing persistent brown tips or reacting badly despite otherwise good care — is to try filtered water, collected rainwater, or distilled water for a few weeks and watch whether new growth comes in cleaner. Judge by new leaves, not the ones that are already damaged.
Troubleshooting Common Watering Problems
If you keep overwatering
- Make sure every pot has a working drainage hole — this is the single most important structural fix
- If you bottom water, shorten your soak times and always remove the pot and let it drain before returning it
- Consider a chunkier potting mix or add perlite to improve drainage and give roots more access to oxygen between waterings
If soil dries into hard, water-repellent clumps
- Do a bottom-watering reset soak first — set the pot in water for 20–30 minutes to rehydrate the whole rootball evenly before returning to your normal routine
- After that, slow down your top watering so water has time to soak in rather than running straight down the sides
- If the mix is old, compacted, or breaking apart, repotting into fresh mix is usually more effective than trying to work around the problem
If fungus gnats keep coming back
Before trying yellow sticky traps or treatments, fix the moisture pattern first. Fungus gnats are strongly linked to persistently moist potting media near the surface — Extension.org makes this point clearly. Let the top layer dry out more between waterings, avoid standing water in saucers, and consider bottom watering to keep the surface drier. Traps can help you monitor the population, but they won’t solve the root cause.
Final Thoughts on Watering Methods
Top watering is fast, practical, and ideal for routine care and periodic salt flushing. Bottom watering is controlled, gentle on foliage, and excellent for plants that do better without wet crowns or a consistently damp surface. Neither method is universally better — the one that suits your plant, your mix, and your home is the right one.
If you take one thing away: whatever method you use, drainage is what makes it work. A pot that drains freely, a saucer you actually empty, and soil you check before watering rather than watering on autopilot — that combination will do more for your plants than any particular technique.
FAQs
Is bottom watering better than top watering?
Not universally. Bottom watering is excellent for plants like African violets that do better without water on their leaves or crowns, and for rehydrating very dry rootballs evenly. Top watering is generally easier for routine use and is the only reliable way to flush accumulated salts from the mix. Most home growers benefit from using both, depending on the situation.
How long should I bottom water my plants?
Around 10–15 minutes for small pots and 20–30 minutes for medium ones. Larger pots or very dry mixes may need up to 45 minutes. The signal to stop is when the top of the soil feels evenly damp when you press it lightly. Remove the pot promptly — leaving it in water for hours defeats the purpose of controlled watering.
Will bottom watering cause salt buildup over time?
It can, if you never flush the mix from above. Fertilizer and hard water both leave mineral salts behind in the soil, and bottom watering doesn’t wash them out. University of Illinois Extension recommends periodically leaching the soil — top watering generously until water flows freely from the drainage hole — to prevent accumulation. Doing this once every 4–6 weeks alongside regular bottom watering keeps the balance right.
Does leaving tap water out overnight make it safer for plants?
Sometimes. It can help reduce free chlorine, which does off-gas over time. But many water systems now use chloramine, which is more stable and doesn’t evaporate the same way — so sitting water overnight may not change much. If your plants are consistently showing brown tips or sensitivity, switching to filtered or collected rainwater for a few weeks is a more reliable test than leaving tap water out.
Can bottom watering help with fungus gnats?
Yes, indirectly. Fungus gnats prefer moist surfaces for laying eggs, so keeping the top layer of soil drier between waterings is one of the most effective ways to disrupt their cycle. Bottom watering naturally keeps the surface drier than top watering does. The important caveat is that you still need to remove the pot from the water promptly and avoid leaving any standing water in the saucer, or you’ll recreate the damp conditions that encourage them.
Can I use bottom watering for all my plants?
For most plants, yes — but not exclusively. Plants in very chunky, fast-draining mixes (orchids, aroids) are better served by top watering, which moves water through quickly and flushes the mix as it goes. For any plant you bottom water regularly, add a top-water flush once a month or so to prevent salt accumulation. Other than that, bottom watering is a perfectly valid main method for a wide range of houseplants.
Sources and Further Reading
- NC State Extension – African Violets
- University of Illinois Extension – Salts in Container Soils
- Extension.org – Fungus Gnats in Indoor Plants
- US EPA – Water Disinfection with Chloramine (PDF)
- Idaho DEQ – Water Contaminants
- University of Maryland Extension – Watering Indoor Plants