Repotting is the “reset button” for container plants: fresh mix restores airflow around roots, a slightly larger pot gives room for new growth, and proper drainage prevents the soggy conditions that lead to root rot. The trick (especially in a small flat) is doing it cleanly and choosing a pot that’s bigger enough—but not so big that the compost stays wet for too long. The Royal Horticultural Society (RHS) recommends avoiding overpotting and moving up only slightly, because fresh compost can sit too wet in an oversized container. RHS: Overpotting
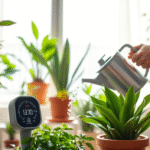
This guide is built for real homes: a small workspace, minimal mess, and a clear “what to do next” plan. You’ll learn the right pot size (with real measurements), drainage rules that actually work, and a step-by-step repotting method you can follow like a checklist—plus a photo plan so you can add your own step-by-step images for WordPress.
Why Your Houseplants Need Repotting
Even if your plant still looks “fine,” the compost breaks down over time and compacts, reducing air around the roots. RHS notes that compost degradation and compaction reduces the volume of air reaching roots and can promote disease—one of the reasons repotting (or refreshing compost) matters. RHS: How to grow houseplants (when to repot)
Signs your plant has outgrown its current home
Repot when you see a clear “root zone problem,” not just because the calendar says so. Common signs:
- Roots circling tightly when you slide the plant out (a root “coil” or dense mat)
- Roots coming out of drainage holes or visible at the surface
- Water runs straight through quickly because the pot is mostly roots
- The plant dries out much faster than it used to in the same spot
- The plant becomes top-heavy and tips easily
Benefits of repotting (what actually improves)
Done correctly, repotting improves three things that directly affect plant health: oxygen at the roots, consistent moisture (not soggy, not bone-dry), and nutrient availability from fresh mix. Over time, better root conditions also reduce the risk of rot—Clemson’s HGIC explains that roots need both water and oxygen, and when surrounded by water they can’t take up oxygen and may rot. Clemson HGIC: Indoor Plants – Watering
When Is the Best Time to Repot Houseplants?
For most indoor plants, repot during active growth so they can make new roots quickly. RHS advises that spring is a good time to repot many plants and it’s best to avoid autumn or winter because growth slows and fresh compost can sit too wet. RHS: How to repot a plant
Seasonal timing (simple rule)
Best: spring through early/mid-summer. Avoid if you can: late autumn and winter unless the plant is in trouble (severe root rot, broken pot, or extreme root binding). RHS: How to repot a plant
Plant-specific notes (don’t overcomplicate it)
Some plants tolerate tight pots longer (snake plant, ZZ), while fast growers can fill a pot quickly (pothos, spider plant). When in doubt: do the root check. If roots are circling hard and the mix is collapsing or drying oddly fast, repot (or refresh the compost) regardless of plant type.
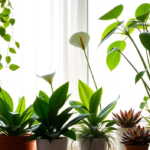
Selecting the Perfect Pot Size for Your Plants
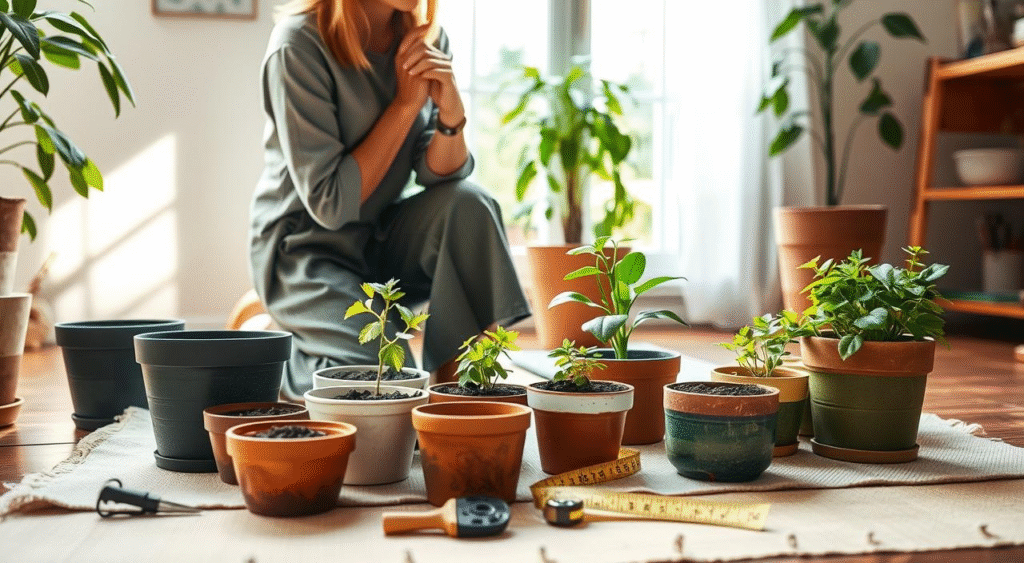
Pot size is where most repotting goes wrong. Too small and the plant dries out constantly. Too big and the compost stays wet, which raises rot risk. RHS guidance is very practical: for smaller containers, move up about 2.5–5cm (1–2in) wider (and not much deeper). RHS: Overpotting
The “one size up” rule (with real numbers)
Use this as your default:
- If your pot is under ~25cm (10in): go 2.5–5cm (1–2in) wider and not much deeper. RHS: How to repot a plant
- If your plant is already in a large pot: consider refreshing compost + light root pruning in the same container instead of upsizing again (especially for heavy floor plants).
Pot shape matters more than people think
Match the pot to the root style:
- Deep pots: better for plants with deeper root systems
- Wider pots: better for plants that spread laterally or produce offsets
- Very deep “long” pots: be careful—extra depth can hold extra wet compost in low light
Material matters: plastic vs ceramic vs terracotta
Material changes drying speed. Plastic holds moisture longer. Terracotta is porous and can help over-waterers by letting the mix dry faster. Ceramic looks great but varies—some are glazed and behave more like plastic. Choose based on your watering habits, not just aesthetics.
Ensuring Proper Drainage for Healthy Roots
Drainage holes are non-negotiable
If water can’t escape, oxygen becomes the limiting factor and rot becomes more likely. Overwatering kills roots by depriving them of oxygen, which is why drainage and mix structure matter so much. Clemson HGIC: Indoor Plants – Watering
The “rocks at the bottom” myth (skip it)
Adding gravel or crocks at the bottom doesn’t “improve drainage” the way people think. Washington State University Extension explains that water won’t move easily from fine soil into a coarser layer until the fine soil is saturated—meaning the soil above can stay wetter than expected. Use a good potting mix throughout and (optionally) a small mesh screen over the hole to stop soil loss. WSU Extension (Chalker-Scott): The Myth of Drainage Material in Container Plantings (PDF)
Decorative pots with no holes (use them safely)
If your cover pot has no drainage holes, treat it as a cachepot (a decorative sleeve), not the planting pot:
- Keep the plant in a nursery pot with holes, then place it inside the decorative pot.
- Water the plant at the sink, let it drain fully, then return it to the cachepot.
- Never leave standing water in the bottom—tip it out.
If drilling is possible, drill a hole and use it as a real pot—but for many renters, the nursery-pot-inside-cachepot method is the cleanest solution.
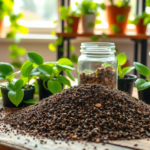
Preparing for a Mess-Free Repotting Experience
Mess-free repotting is mostly about setup. Once your workspace is “contained,” the rest is easy.
Mess-free checklist (apartment version)
- Work inside a large tray, shallow storage box, or open bin bag to catch soil
- Pre-moisten your potting mix so it’s slightly damp (less dust, easier packing)
- Keep a small bowl for “old soil” and a separate bowl for “fresh mix”
- Have wipes or a small handheld vacuum ready for the final 2 minutes
Tools and materials
- New pot with drainage holes (or nursery pot + cachepot)
- Fresh potting mix suitable for indoor plants
- Gloves (optional)
- Clean snips/scissors for dead roots
- Mesh screen or coffee filter for the drainage hole (optional)
Clean pots and tools (fast, worth it)
Reusing a pot? Clean it first. Iowa State University Extension recommends removing soil, washing, then soaking containers in a solution of one part household bleach to nine parts water for at least 10 minutes, then rinsing. Iowa State Extension: Clean and disinfect plant containers
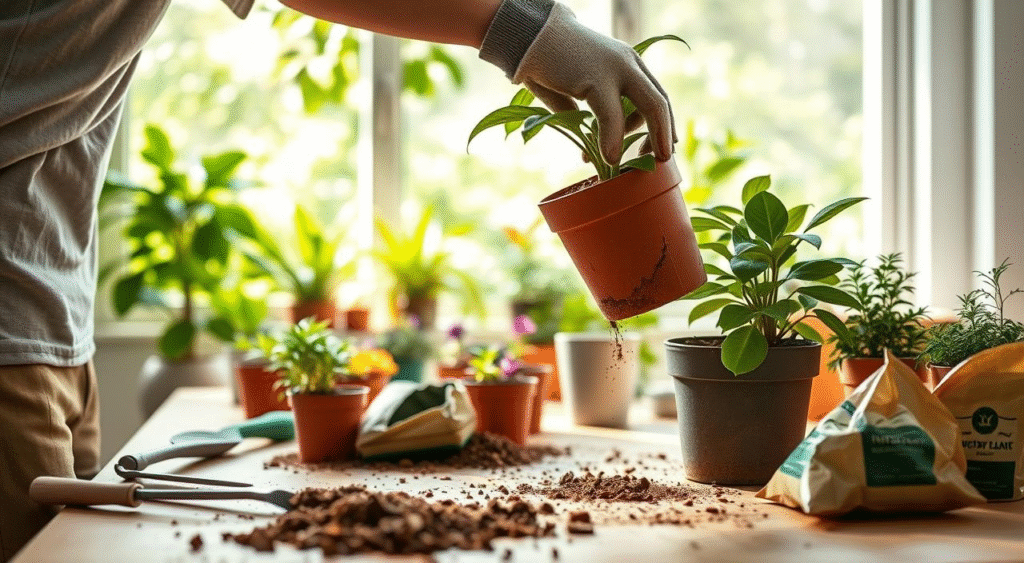
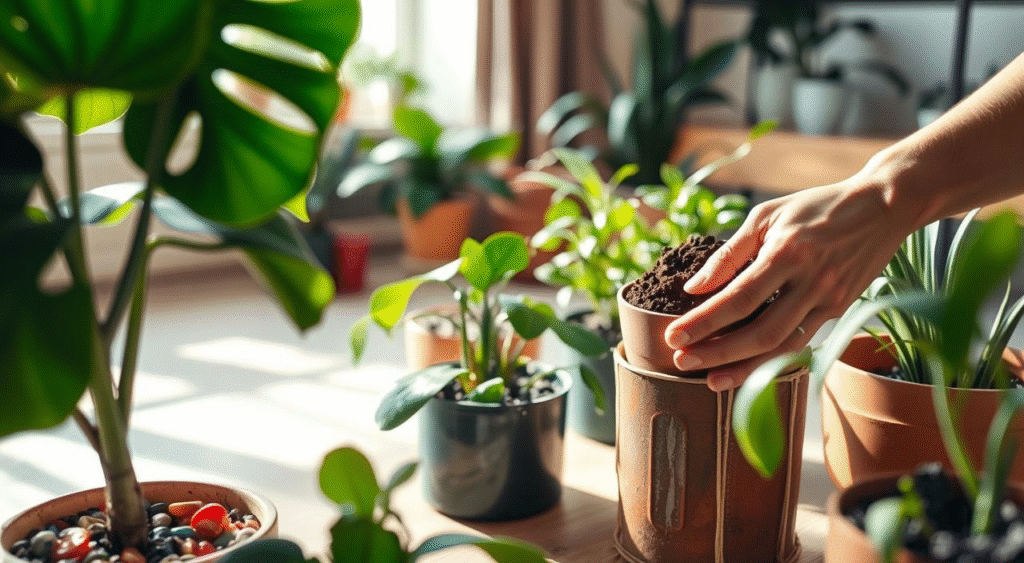
Repotting Without the Mess: Step-by-Step
This is the “do it like a calm person” method. Read once, then follow it like a checklist.
Step 1: Water the day before (optional but helpful)
If the plant is bone-dry, water lightly the day before. A slightly moist rootball slides out more cleanly and protects fine roots. Avoid repotting when the pot is soaking wet (it’s messy and roots tear more easily).
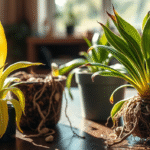
Step 2: Slide the plant out and inspect roots
Support the base of the plant, tip the pot, and slide the rootball out. Look for:
- Healthy roots: firm, light-colored, no bad smell
- Rot: dark, mushy, smelly roots (trim these)
- Severe binding: roots circling repeatedly (loosen gently)
Step 3: Trim only what needs trimming
Remove dead/mushy roots with clean snips. If the plant is rootbound, gently tease the outer ring of roots loose—don’t “shred” the entire rootball. The goal is to encourage roots to grow outward into the new mix.
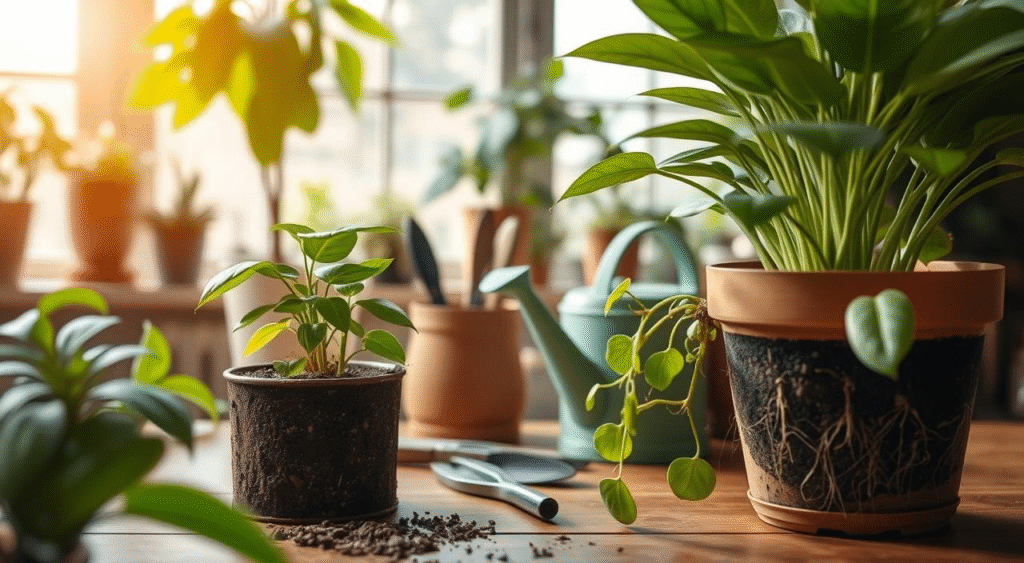
Step 4: Prep the new pot (no rock layer)
Put a mesh screen or coffee filter over the drainage hole if you want to stop soil escaping. Don’t add gravel “for drainage”—WSU Extension explains why this can keep the soil above wetter than expected. WSU Extension (PDF)
Step 5: Set the height correctly
Add a little fresh mix to the bottom, then set the rootball so the plant sits at the same soil line as before. Aim for a small “watering lip” at the top (space below the rim) so water doesn’t spill over the edge.
Step 6: Backfill and firm gently
Fill around the sides with fresh mix. Press lightly to remove obvious air pockets, but don’t compact the soil into a brick. A healthy root zone needs air.
Step 7: Water once to settle, then slow down
Water thoroughly until a little drains out, which settles the mix around roots. Then pause: a newly repotted plant often needs less frequent watering at first because there’s more fresh compost holding moisture. Overwatering is a common reason repotted plants decline—roots need oxygen as well as water. Clemson HGIC: Indoor Plants – Watering
Step-by-Step Photos You Can Add to This Post
If you want “step-by-step photos” in WordPress, here’s the simplest set that makes the article feel truly original. Use your phone, bright indirect light, and the same background for each shot.
- Tools + protected workspace (tray/tarp/bag) and the new pot
- Rootball slid out of the old pot (show root circling or root health)
- Close-up of root trimming (dead/mushy roots removed)
- Drainage hole with mesh screen (no rocks)
- Plant positioned at correct height (watering lip visible)
- Finished plant + first watering draining out
Special Repotting Situations (Big Plants, Delicate Plants, “No Bigger Pot” Options)
Large or heavy plants (save your back)
If a plant is too heavy to lift safely, don’t force it. Options that still help:
- Top-dress: remove the top few centimetres of old compost and replace with fresh mix
- Same-pot refresh: slide the plant out, trim a small amount of outer roots, and repot into the same container with fresh mix around it
- Use a plant dolly so you can move it without strain
Delicate plants (minimal disturbance)
For plants that sulk easily, keep disruption low: don’t aggressively tease roots, don’t fertilize immediately, and give a week or two of gentler light while they adjust.
Post-Repotting Care to Minimize Transplant Shock
First week “recovery mode”
- Keep in bright, indirect light (avoid harsh direct sun for a week)
- Water only when the plant’s normal “dry point” is reached (fresh compost holds moisture longer)
- Skip fertilizer for a few weeks unless you’re using an inert medium
The most common repotting mistakes (and quick fixes)
- Overpotting: compost stays wet for days → move back down a size or water extremely carefully while it dries; avoid the mistake next time. RHS: Overpotting
- Rock “drainage layer”: soil stays wetter than expected → remove the layer at the next repot; use mix throughout. WSU Extension (PDF)
- Overwatering after repotting: yellowing + limp growth → pause watering and let the mix dry appropriately; roots need oxygen. Clemson HGIC
Conclusion
Repotting isn’t about “upgrading” to the biggest pot you can find. It’s about keeping the root zone breathable, stable, and easy to water correctly. If you remember just three rules, you’ll avoid most problems: repot mainly in spring/early summer, move up only slightly (about 2.5–5cm wider for small pots), and make drainage non-negotiable. RHS: How to repot a plant RHS: Overpotting
Once you’ve done it a couple of times, repotting becomes a calm maintenance habit: protect the workspace, check the roots, refresh the compost, water once to settle, then slow down. Your plants respond with the only “thank you” they know—new growth.
FAQs
Q1: How often should I repot my houseplants?
There’s no perfect schedule, but many container plants benefit from repotting (or compost refresh) every few years. RHS notes compost degrades and compacts over time, which is one reason potting on every 2–3 years is often recommended for houseplants. RHS: How to grow houseplants (when to repot)
Q2: What size pot should I move up to?
As a rule of thumb, go only slightly larger. RHS recommends a pot about 2.5–5cm (1–2in) wider (and not much deeper) for smaller containers, and warns against overpotting because compost can sit too wet. RHS: Overpotting
Q3: Do I need rocks at the bottom for drainage?
No. WSU Extension explains that coarse layers can hinder water movement and keep the soil above wetter until it becomes saturated. Use a good mix throughout and rely on drainage holes. WSU Extension (Chalker-Scott) PDF
Q4: Can I repot in winter?
You can if it’s urgent, but it’s not ideal. RHS advises avoiding autumn/winter when growth slows because fresh compost can sit too wet for longer. If you must repot, keep the pot size modest, avoid overwatering, and give bright indirect light. RHS: How to repot a plant
Q5: Should I fertilize right after repotting?
Usually no. Fresh potting mix often contains nutrients already, and stressed roots can be sensitive. Focus on steady light and careful watering first—overwatering is a bigger threat than under-feeding right after repotting. Clemson HGIC
About the author
Mohammed zandar (yup.work90) writes practical indoor-plant guides for real homes—small spaces, imperfect light, and busy schedules. His focus is repeatable plant care systems: soil structure, drainage, pot sizing, and low-mess routines that keep houseplants healthy long-term.